👉 A fair warning: This project is mostly just regular bookbinding, similar to perfect binding with folded sheets combined with hardcover techniques. The only part that’s truly 3D printed is the cover panels, which makes them far easier to work with. They resist bowing while gluing and don’t have to be cut out — to me that’s 100% worth the tradeoffs. I also 3D printed a few different tools like a small press, clamps, and jigs for cutting and folding pages, but the main 3D printed element is the hardcover itself. The book is still mostly made of paper, you know, as books usually are.
This technique is quite close to a few different techniques I’ve seen before, including:
- “How I Make Hardcover Lay-Flat Notebooks” by ittia-9b
- “DIY Perfect Bookbinding Tutorial” by Sea Lemon
- “DIY Hardcover Book | Case Bookbinding Tutorial” by Sea Lemon
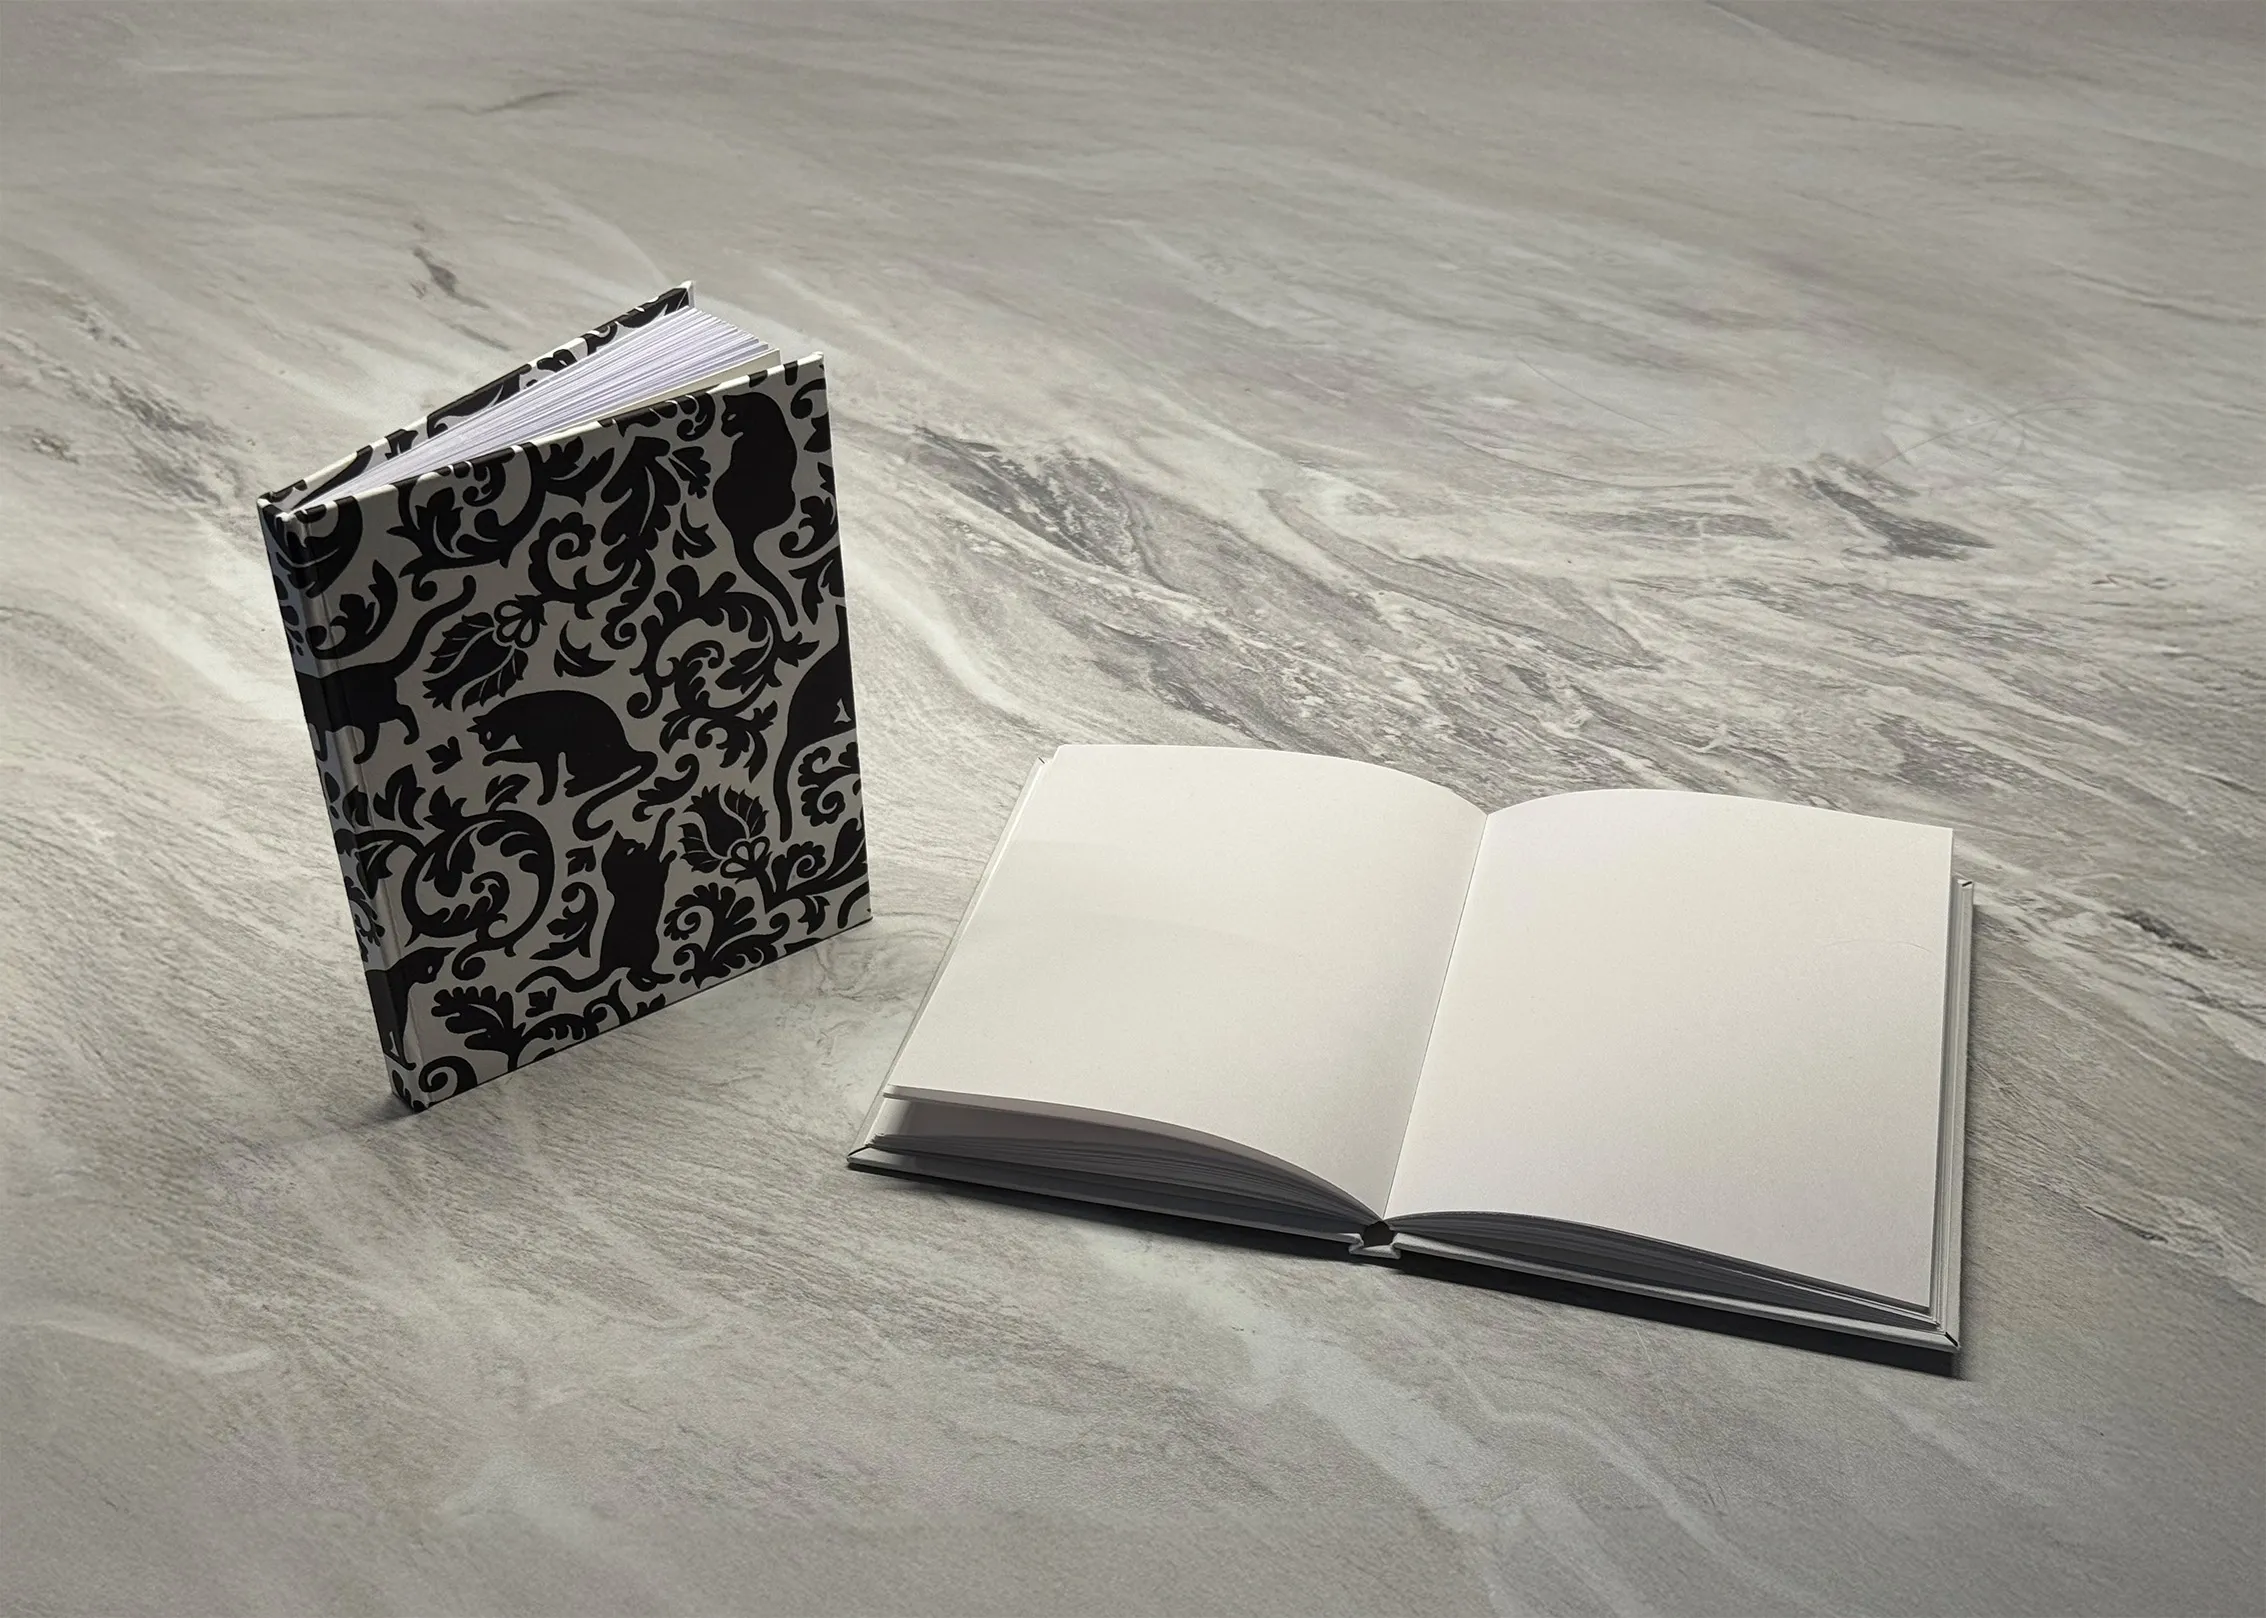
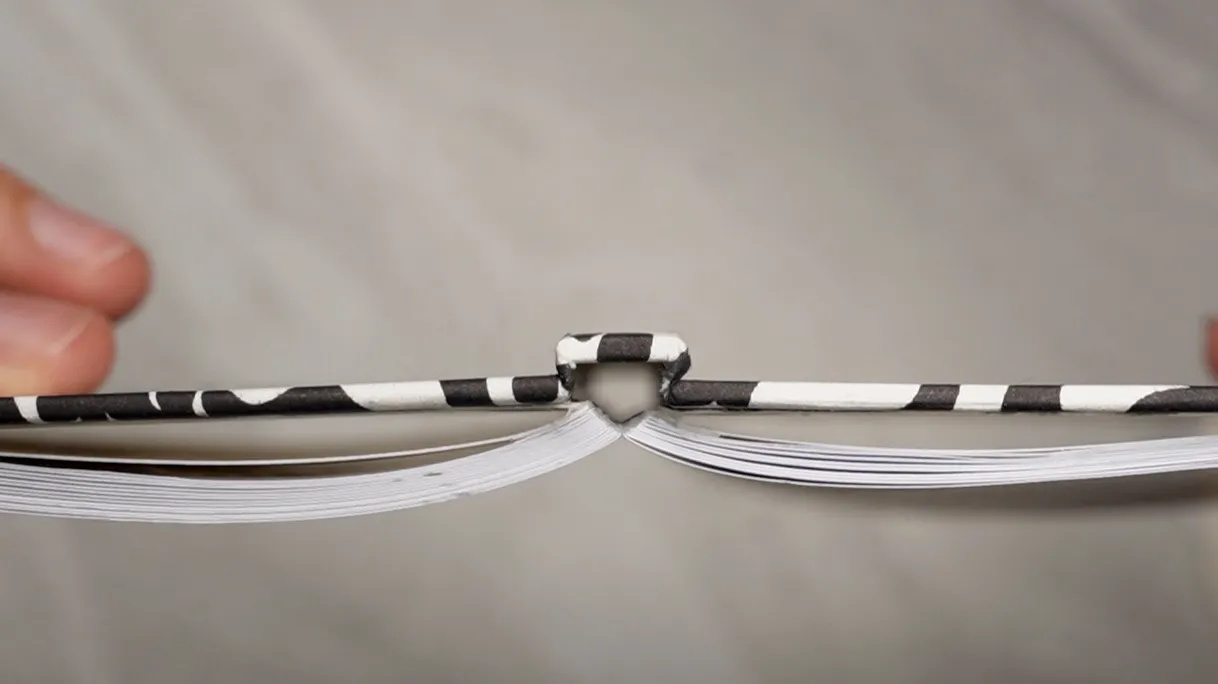
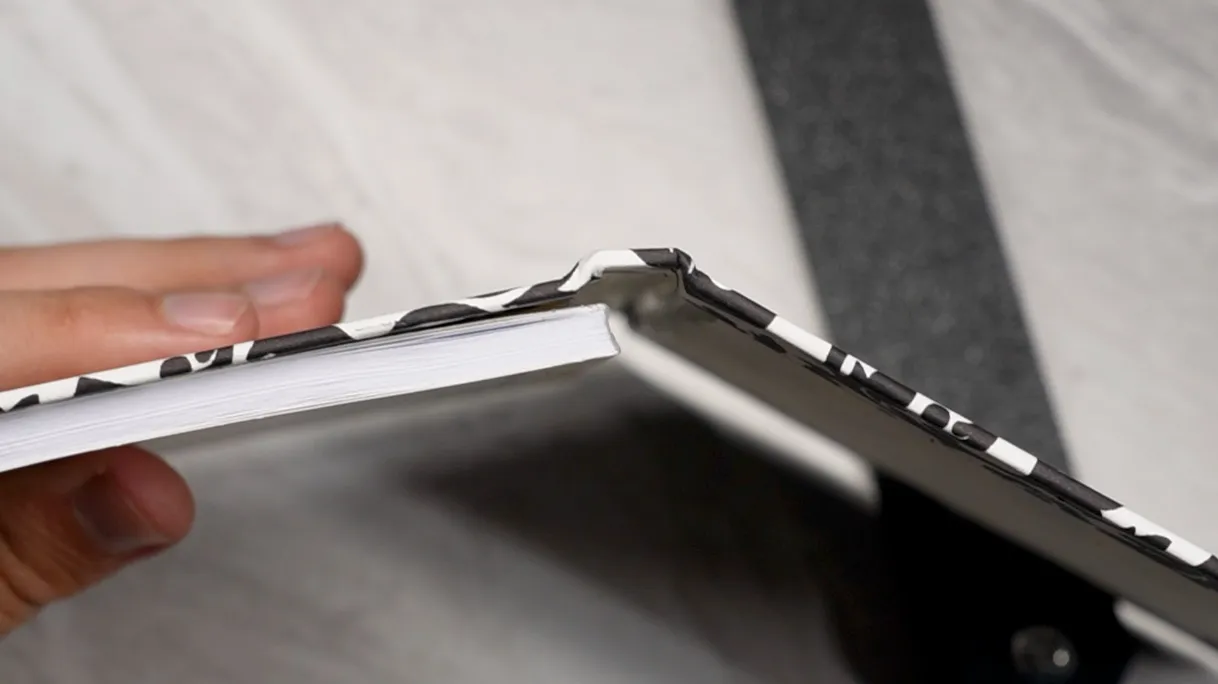
The main differences between theirs and mine are the use of 3D printed panels and card stock instead of fiberboard and fabric for the hardcover case. As far as I know, it’s not technically perfect binding since it’s hardcover, and is non-traditional because it glues up folded leaves instead of sewn signatures. However, it’s not super important what the technique is called. At the end of the day, it’s simpler and requires fewer tools than some more traditional/popular bookbinding techniques at the expense of durability. The neat thing about it is that the text block is secured to the cover by the end pages only, so opening the book creates a gap inside the spine and helps it lay quite flat.
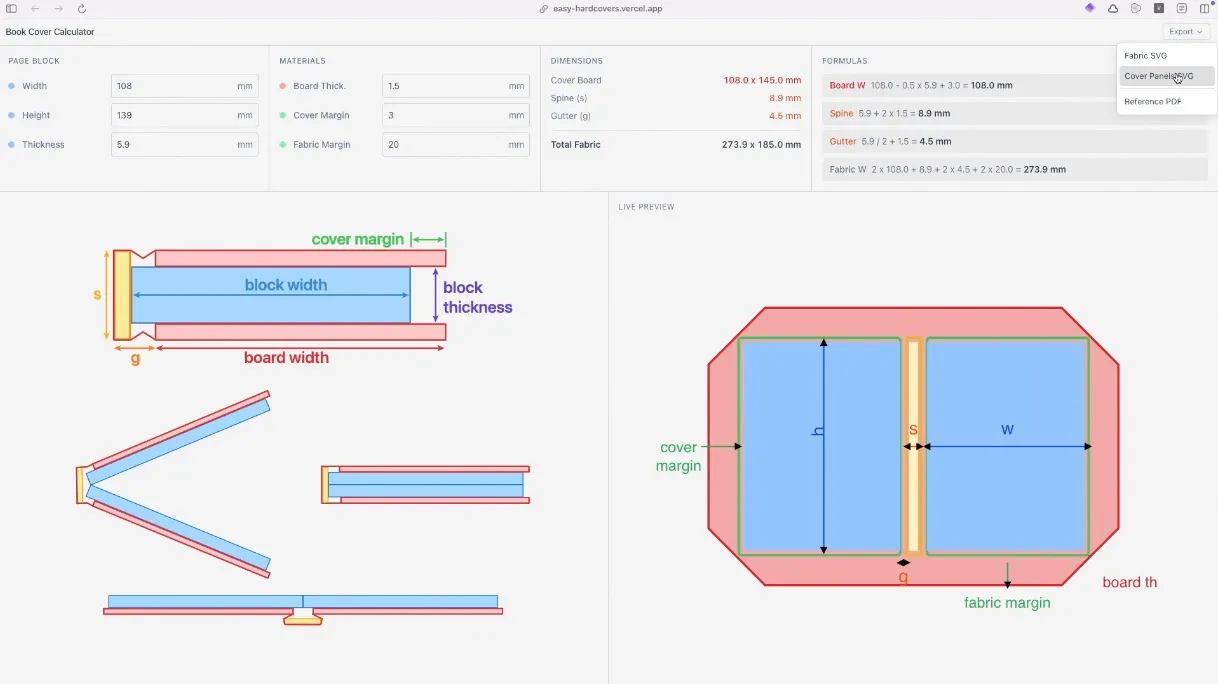
Ittia-9b also vibe-coded the original React web app mentioned in the instructions: https://ittia-9b.github.io/easy-hardcovers/. It’s quite good! I re-created the tool with SvelteKit and added export options for printing and plotting at https://easy-hardcovers.vercel.app/. Many thanks to ittia-9b for creating the original idea, tool, diagrams, and video. They are insanely helpful for understanding the process.
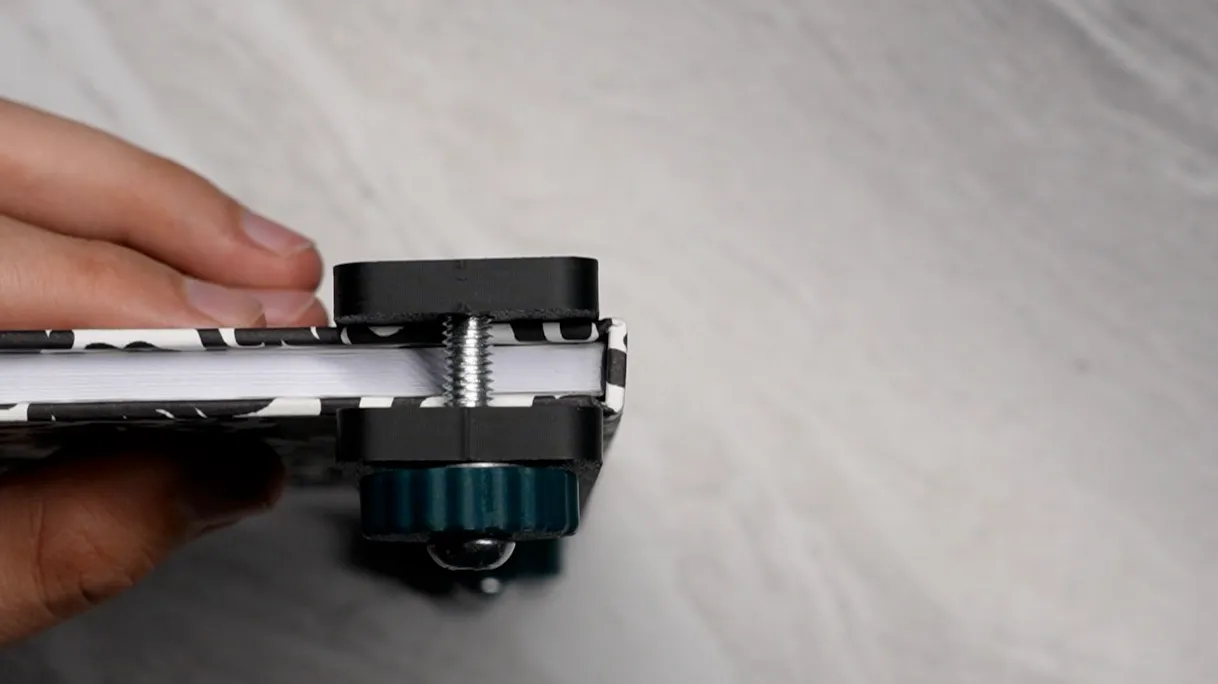
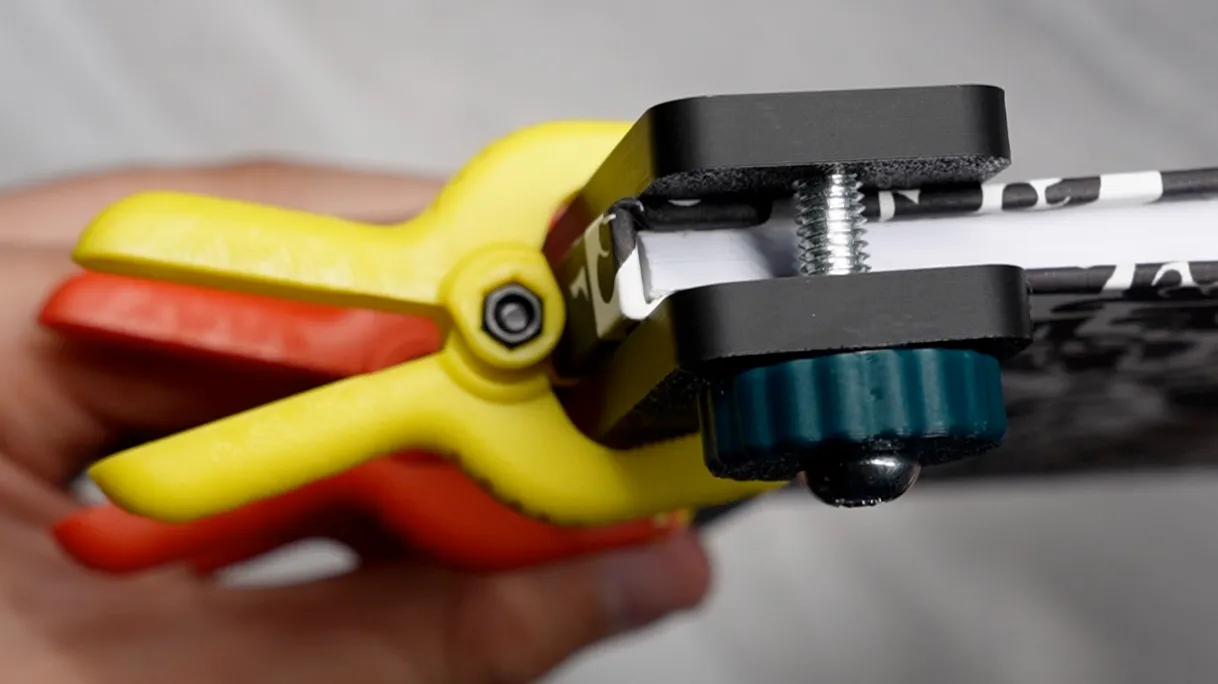
Throughout this process since I don’t have a book press, I designed a very small one that can be 3D printed for this project. It’s not great, but it works well enough alongside mini craft clamps of any variety. The link is here: https://makerworld.com/en/models/2475283-small-book-press-quarter-letter-sheet-size#profileId-2718182
I also used a 3D printed paper folding tray to cut the letter sheets and repurposed it for folding the half-sheets in half to make the folios. It’s meant for letter sheets, but I also used the corner to line up the edges of the half sheets while folding them. The link is here: https://www.printables.com/model/961520-paper-folding-tray
Here are most of the materials I used:
- 20x long-grain 100gsm letter pages
- 2x long-grain card stock letter pages (Or just 1 if you have a larger sheet or book cloth for the cover)
- Optional - A letter-sized (short-grain) or 12x12 card stock sheet for the cover
- Lineco neutral pH PVA glue
- Mousseline super (gauze works, too)
- Wax paper
- Isopropyl alcohol (IPA, to rinse brushes)
- 3D printing filament (or just use fiberboard)
Here are most of the tools I used:
- Utility knife
- Bone folder
- Ruler
- Pencil
- Small paintbrushes
- Inkjet printer
- Mini craft clamps (or real clamps)
- Small 3D printed book press
- Paper folding tray
- Paper cutter if you have one (I don’t, but it makes your job easier)
- Digital calipers (not strictly necessary if you have a metric ruler)
- Book cover calculator web app
- Sandpaper or nail file
The process is basically as follows:
- Cut long-grain letter paper in half the short way (hamburger style).
- Fold each sheet in half, such that the grain is now parallel to the creased edge.
- Prepare one letter-sized piece of long-grain card stock the same way as the interior leaves to create two folded endpapers.
- Align the folded sheets so they all have the crease on the same side, with the endpapers on either side of the block.
- Knock the block up and temporarily clip the end of it so the pages stay together.
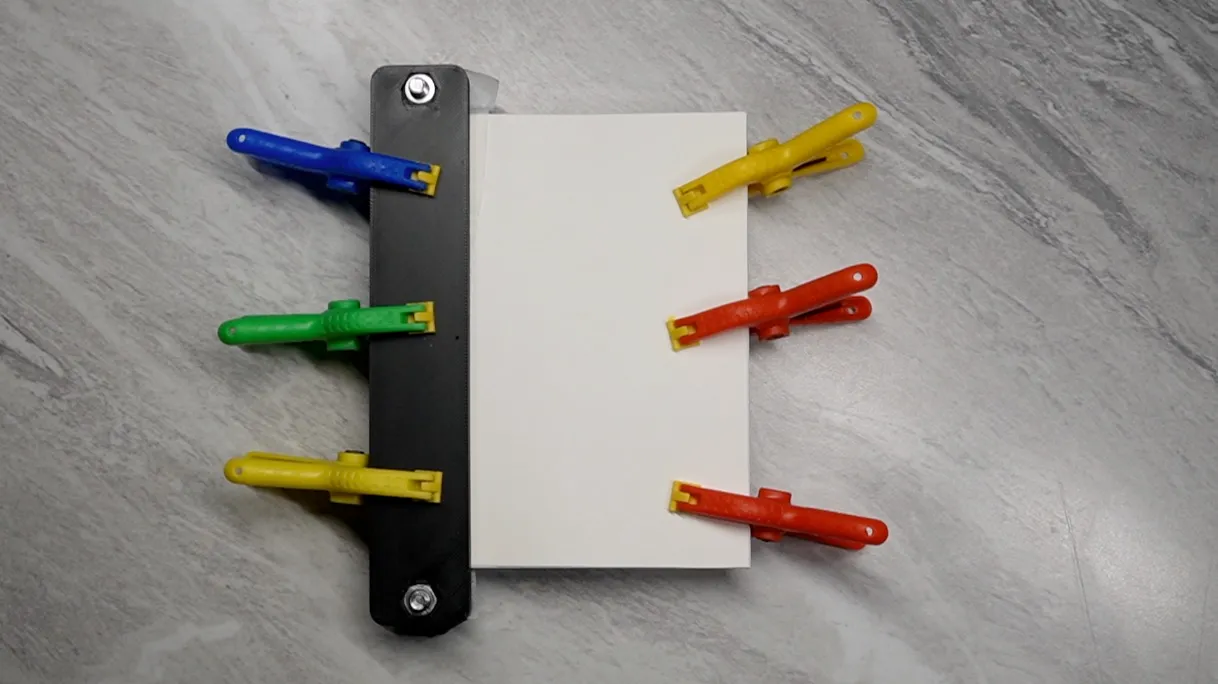
- Place the block inside a book press or clamps with the creased ends slightly exposed.
- Roughen (with sandpaper) and glue up the spine with archival PVA glue with a clean brush. Let dry.
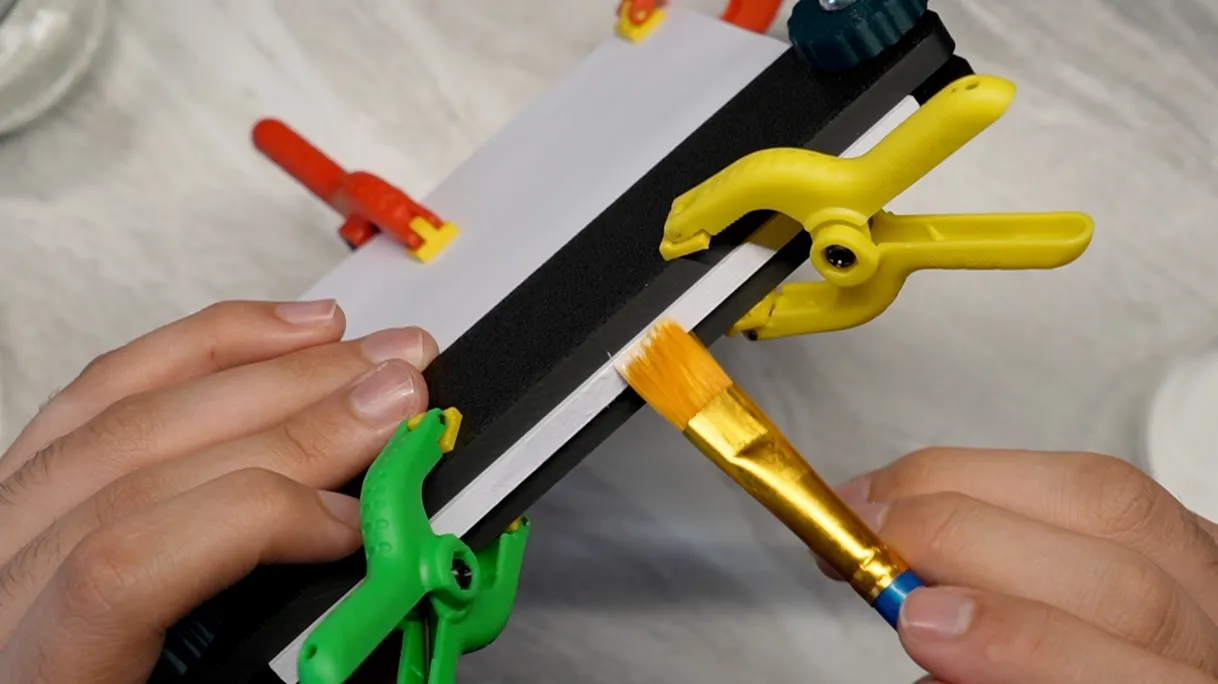
- Elmer’s technically works but Lineco PVA is much more flexible when dried. More on that later.
- Apply another coat of PVA and let dry. Wash the brush with IPA and dry as soon as the glue is applied.
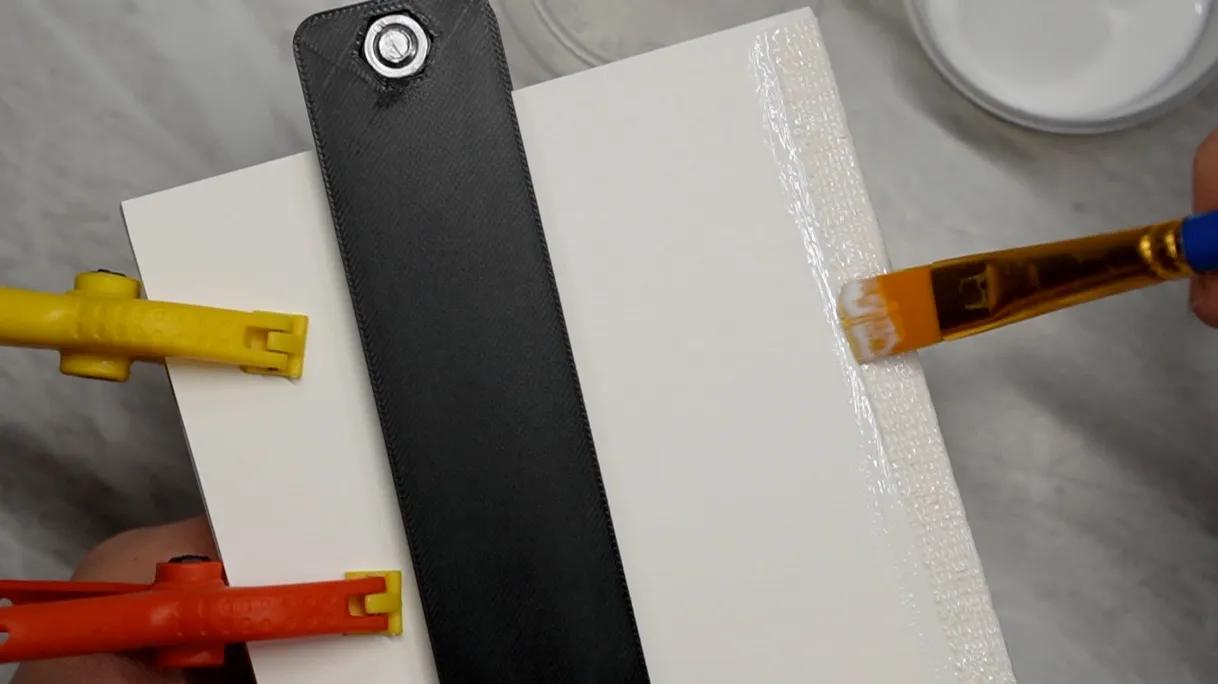
- Measure the thickness of the text block at this point. Cut a strip of super that is the same length as the text block and about three times the width of the spine. I used Lineco Mousseline Super from the same store as the glue.
- Loosen the press, expose a few more centimeters of the spine end of the block, and clamp it down again.
- Apply a third coat of PVA to the spine as well as the spine edge of the outside of the text block, in a strip about the same width as the spine. Do not let dry yet.
- Press the super onto the spine. Add glue to the inside of the overhanging super and press that in too.
- Apply a thin layer of PVA over the super on the spine and the folded-over section on each side.
- Cover the spine with wax paper. Loosen the press and clamp the block back down with the wax-papered spine fully under pressure this time.
- After letting dry for a few hours, remove the block from the press and carefully peel away the wax paper.
- At this point, you would usually trim the end of the text block to make it neater. However, making use of jigs for cutting and folding means that if you’re careful, you probably won’t have to. It’s highly annoying without a nice guillotine paper cutter, anyway. After making a few practice books, the ends stopped being messy and trimming became completely unnecessary. If you want to cheat even more, you can buy long-grain 5.5x8.5 inch (half-letter, hotdog style) sheets of paper.
- Enter text block dimensions and desired cover panel thickness into the Book Cover Calculator at https://easy-hardcovers.vercel.app/.
- Export the cover panels SVG and reference PDF.
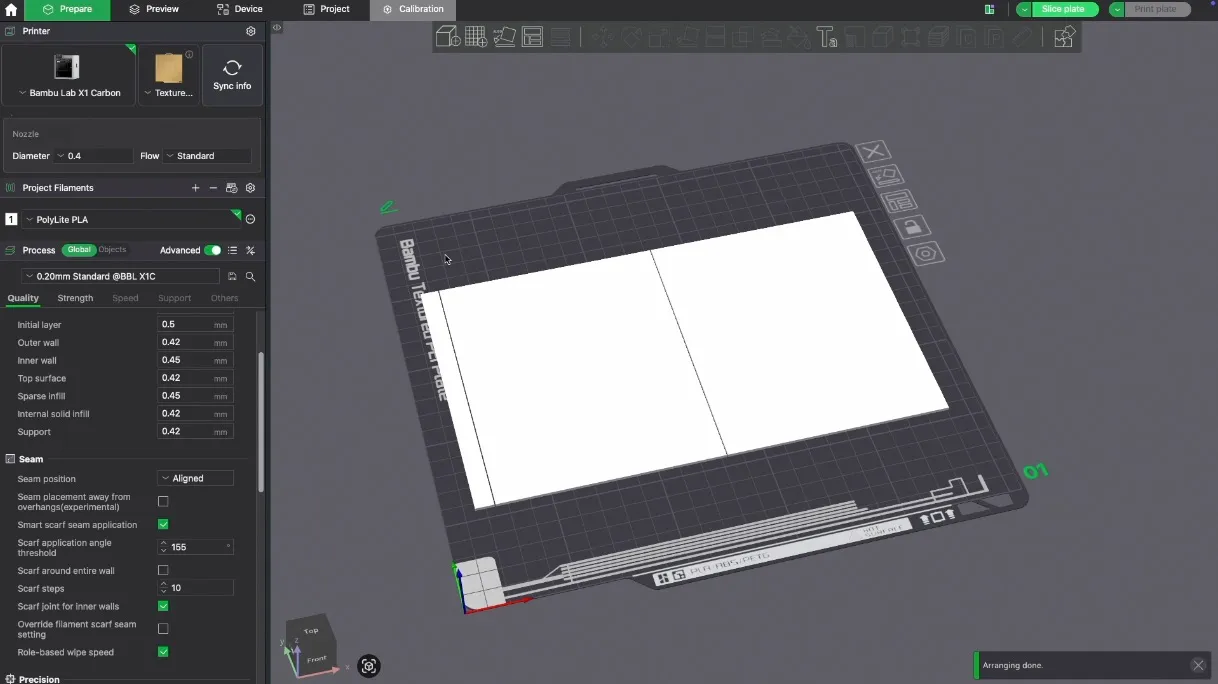
- Import the SVG into your slicer, set the thickness to the same as what you set in the calculator website, and print. 1.5mm thickness usually prints solid. If you choose to use infill, ensure there are enough top/bottom layers that it doesn’t show through. 3D print the panels.
- Alternatively, cut the panels out of cardboard, making sure the pieces end up long-grain (it bows less this way).
- Print the reference PDF on a piece of letter-sized card stock. Print your cover design pattern on the opposite side of the printed template, if desired. Cut it out along the the outer lines.
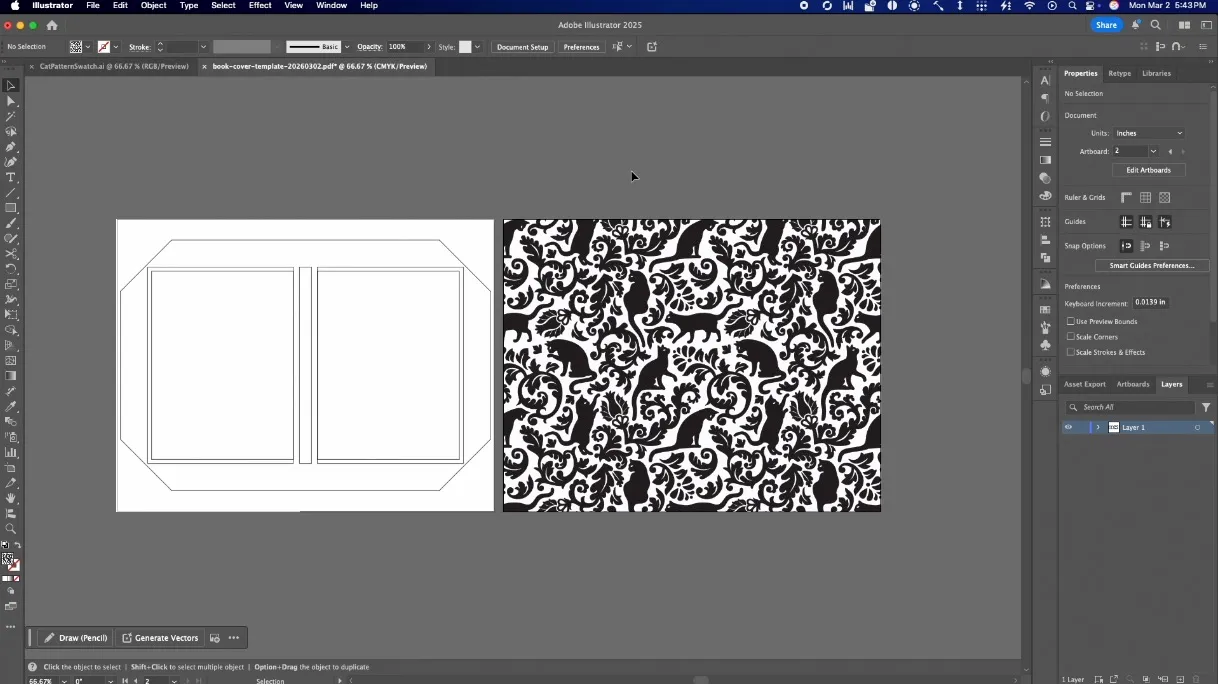
- You can also manually transfer the design and cut it out of a larger piece of card stock or fabric. The website also provides an SVG of the fabric cover pattern for a laser/vinyl plotter.
- Note: Card stock in printable sizes is almost always long-grain, so the cover sheet will have cross-grain folds along the spine, which is non-ideal but unavoidable at letter size without larger stock or short-grain card stock for the cover sheet only. The only real consequence of this is that the spine can buckle or look strange along its creases. It’s not terrible for small books.
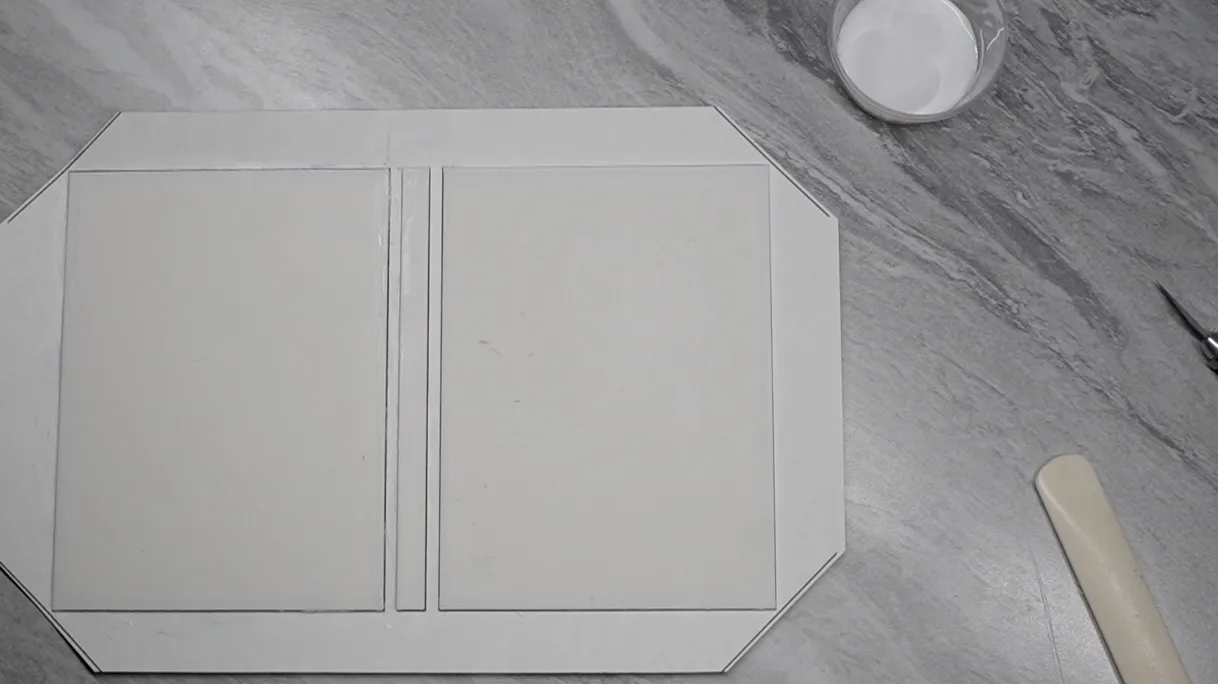
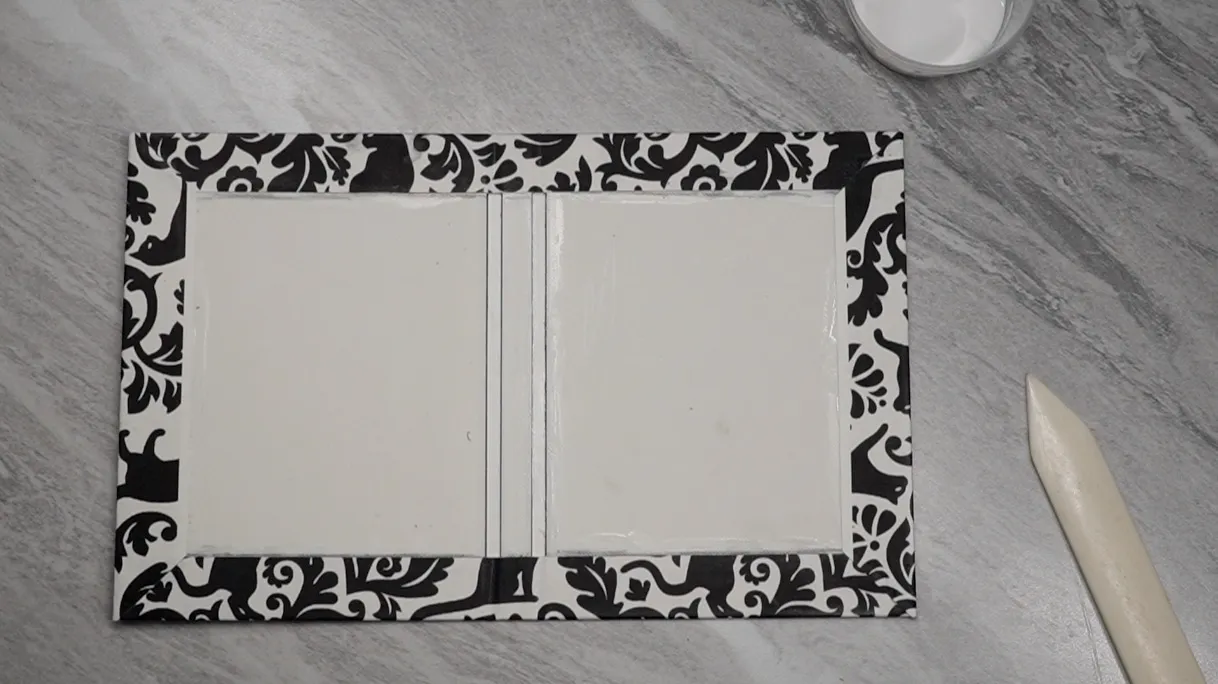
- Apply a thin layer of PVA glue or spray adhesive to the cover panels and spine strip. Make sure you get it all the way to the edges.
- Apply each piece to the template-side of the cover sheet inside the lines, leaving gaps between the spine and panels. Use a bone folder or squeegee to smooth out any bubbles and make sure it sticks all the way at the edges and corners.
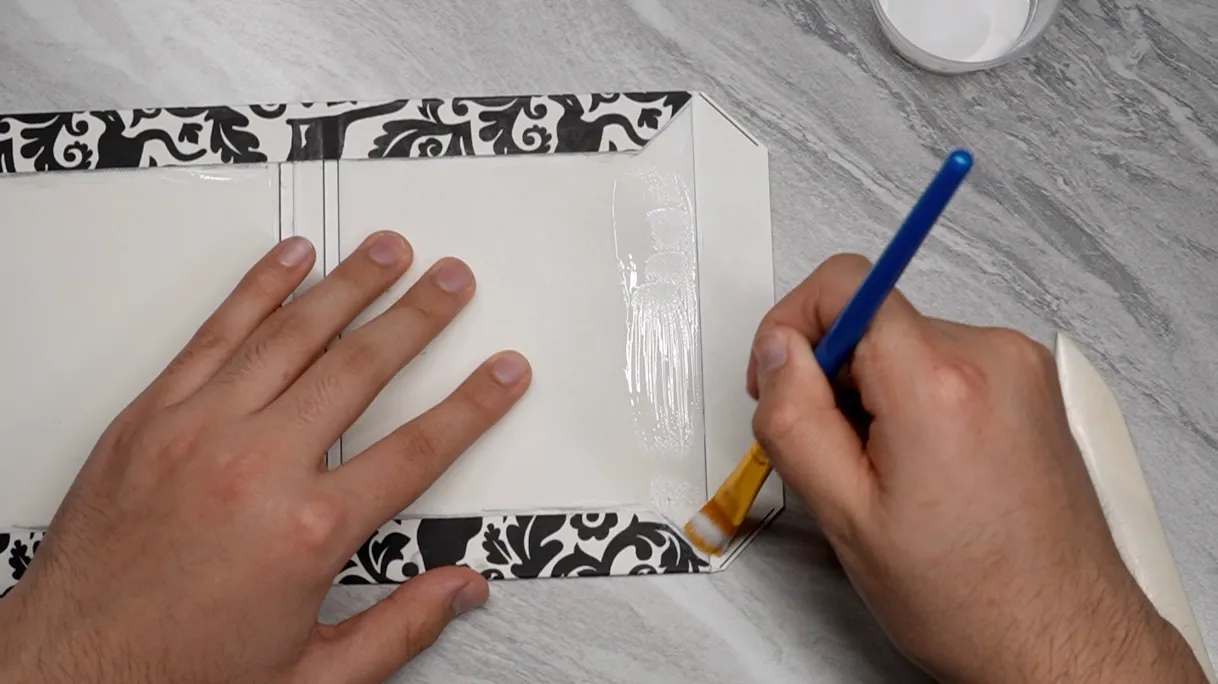
- Fold over the long edges of the cover sheet onto the boards. Mark their outlines on the boards with a pencil.
- Apply glue inside the lines where the sheet lies on the board. Re-fold and adhere the flaps firmly with the bone folder or squeegee.
- Use the pointy end of a bone folder to crease down the corners areas of the remaining two flaps.
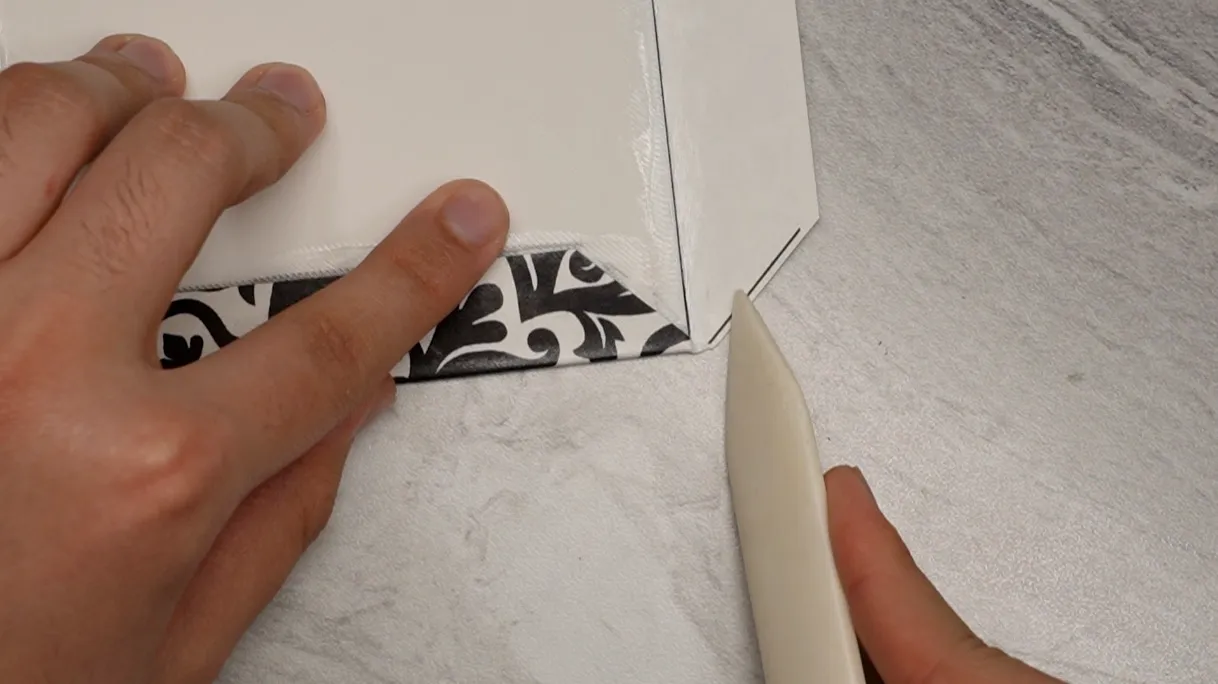
- Neatly fold over the remaining two flaps. Mark, glue, and press them down just like the first two flaps. Let dry.
- Fold the cover along the two gaps near the spine. Bend them both ways. You can also put the cover inside the book press with the spine just barely hanging out to fully form the paper into the correct shape.
- Insert pieces of wax paper inside each of the end spreads.
- Set the text block fully into the folded cover, with the spine of the block touching the spine of the cover. Do not glue the spine. You can put it back in the press the same way as before to fully shape and form the spine.
- Apply a thin layer of glue on the entire outermost face of one of the text block’s end sheets. Apply the glued end sheet to the inside of the cover with the spine fully inside in the cover, in its final position.
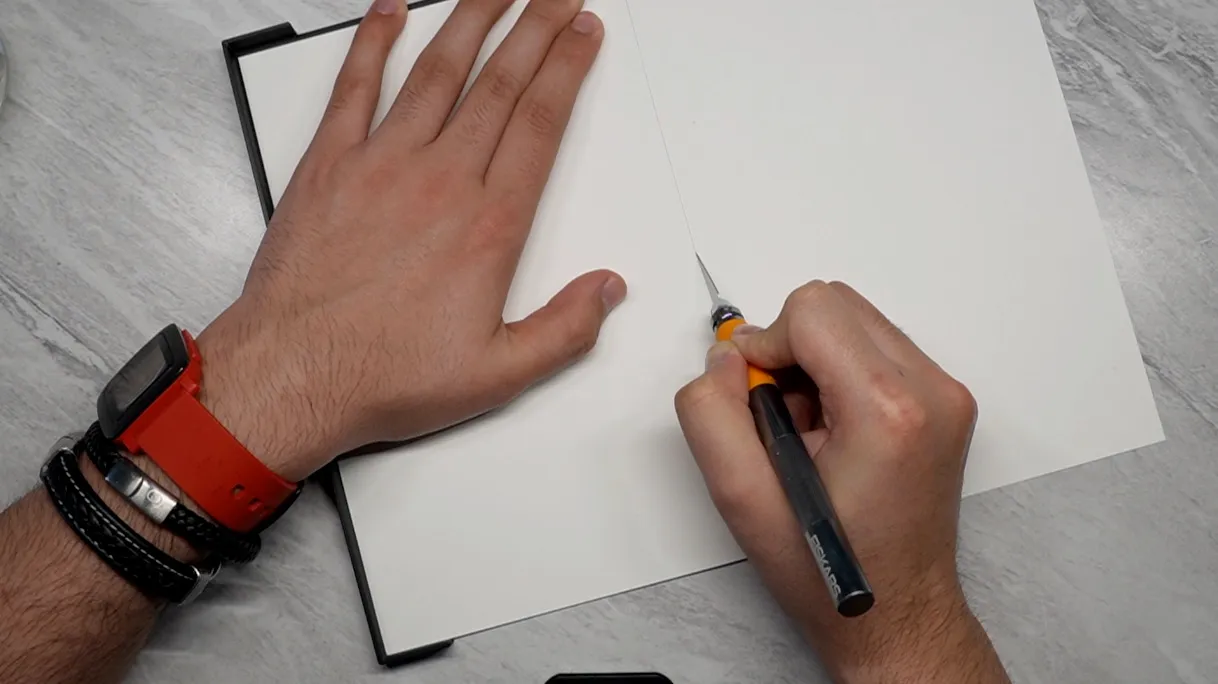
- Gently open the cover and use a bone folder or squeegee to smooth the end paper to the inside of the cover, removing any wrinkles or bubbles. Don’t open it all the way, or it might pull the sheet into the wrong position and crease it when you close it back up. You can use a sheet of wax paper under the bone folder to avoid marring the end pages.
- Put the whole book in the press with the spine out and let dry for a few moments.
- Unclamp and repeat the end page gluing, smoothing, and clamping.
- Let dry for a few hours.
- When you take the book out this time and remove the wax sheets, it will be done.
If there are creases or bubbles in the end pages, carefully cut off the end pages with a hobby knife and attach new ones with another piece of super before trying again.
Note on glue: I compared Lineco pH Neutral PVA with Elmer’s glue-all and while they both worked, the Lineco was thinner and let the book open flatter when completed. Over long periods of time, Elmer’s might also become brittle, but my notebooks generally don’t last that long anyway, because they are very small. I did try to purchase Lineco PVA from Amazon, but since it’s winter time, they kept ruining it by letting it freeze in transit. I ultimately went to a local fine arts store that had a bookbinding section instead. It was much cheaper there and they had other supplies I needed, like the super and clamps.
Note on the 3D printed panels: While the plastic (PLA) panels bond well with PVA and don’t deform when the glue is applied, I have yet to stress-test them. In high heat, like if you left the notebook in a hot car, I imagine the covers would deform just like if a cardboard cover got wet, or at the very least become deformable when handled. You could print them in a higher-temperature material like PETG/ABS/ASA, or simply use fiberboard instead like most people. It’s not actually that hard.
While 3D printing is a pretty small part of this project, it doesn’t have to be that way! I came up with a handful of ideas where this could go if you were so inclined:
- Use a corner punch to round the page corners and 3d print rounded-corner cover panels;
- apply textures to the panels that you can feel through the cover sheet, especially if you make a fabric cover;
- add ribs or depressions in the spine panel for a vintage style;
- disable top/bottom shells to leave the panels’ infill exposed with a cool pattern like honeycomb;
- add a thin printed membrane across the panel gaps;
- leave the cover unwrapped for an exposed 3D print look;
- emboss or depress shapes on the cover panels;
- make multi-material cover panels;
- put shaped holes through the cover that are easy to cut out;
- add a bar that protrudes outside the cover to hold pens;
- inset a piece of acrylic and cut the cover sheet and end pages for a semi-see-through cover;
- put a mirror or bottle opener inside the cover with a hole in the end page for access;
- embed airtags, keys, magnets, nfc tags, cards, or pretty much anything small/flat inside the covers with access holes in the cover sheet;
and probably even more cool stuff I haven’t thought of.
Anyway, that’s about it. Bye.