📢 Please note: Generative AI may have been used to produce or edit text, images, and/or other media on this page. However, all opinions and intellectual property rights remain my own.
I do like to 3D print trinkets. I don’t like modeling them, because I think better in terms of CAD, but this raises a great concern: most trinkets are useless. With AI creeping its way into the fresh new modality of mesh, I can now generate endless useless trinkets that generate more purge waste than they weigh, and yet people love them. People can’t stop buying them.
But, I can’t do that anymore. When I got my Bambu Lab X1 Carbon, after tinkering with various printers over the past decade, I had finally run out of trinkets to print. I never thought the day would come, but even with new models being published every day, the boxes of trinkets haunt me. I hate them. But I love them. I don’t know what to do with them, but I can’t print any more useless tchotchkes from the internet.
I find much more joy and fulfillment in optimizing trinkets that are objectively wasteful, and try to make them as least wasteful as possible. Whether that’s through clever orientations, splitting, printing by parts, or just not printing in multicolor, it forces me to spend time with the things I do decide to print or design, and it really helps me form a more makerly connection with the objects, despite a cold hot, dead machine cranking it out. I put googly eyes on mine to make it less dead, though.
Regardless, I still suck at organic modeling. Blender scares me. I could learn, but I don’t want to. Let’s let AI do the dirty work while I still have some creative freedom. As a wise pop star once said, ♪You get the best of both worlds…♪
The concept
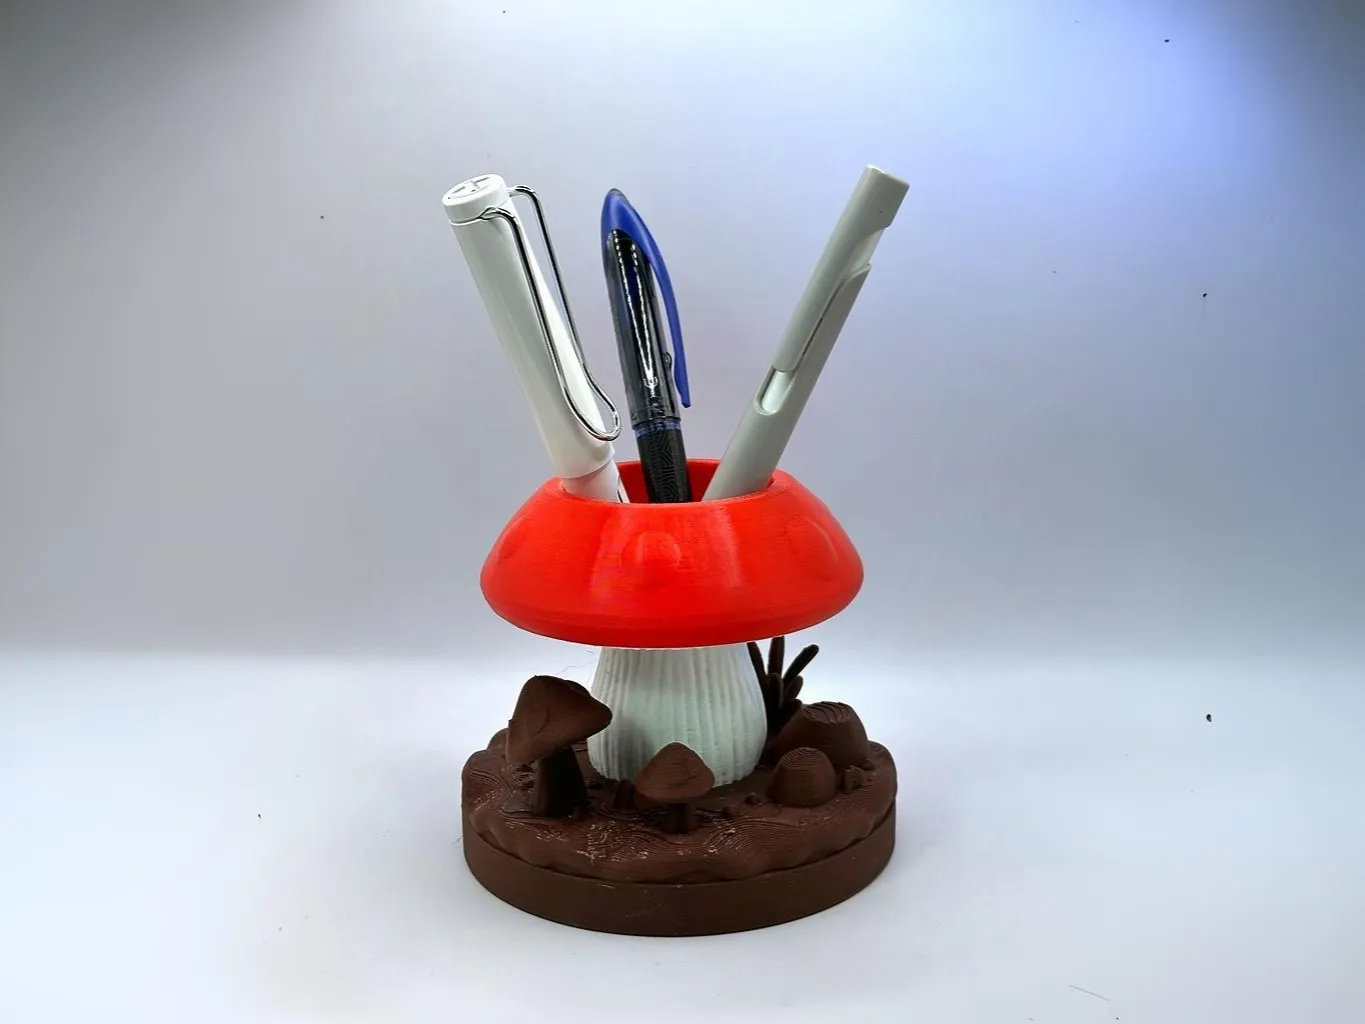
The idea was simple: a little island for your pens to live on. A pen island, if you will. Haha, pen island. See, it’s funny because if you take out the space between the words… nevermind. First things first though, I needed a reference image. Wait, I guess I didn’t really explain what I’m doing. The hot new kind of AI for stealing jobs isn’t just making 3D models out of thin air. I mean, it can, but that’s no fun. The whole pipeline is basically image -> mesh -> print. Okay, I guess it’s not that complicated.
With that, I prompted GPT-4o for a cute mushroom pen holder, iterated on the design a bit, and landed on something worth turning into a real object. The thing is though… ChatGPT’s image generation model is like, really fucking stupid. It kinda took a while to get anything that seemed like it would actually work because it has no concept of physical interactions it wasn’t trained on. But I bet that in just a year, AI will be so much smarter and better at this kind of thing. (Edit March 2026: damn I kinda ate my words here lmao)

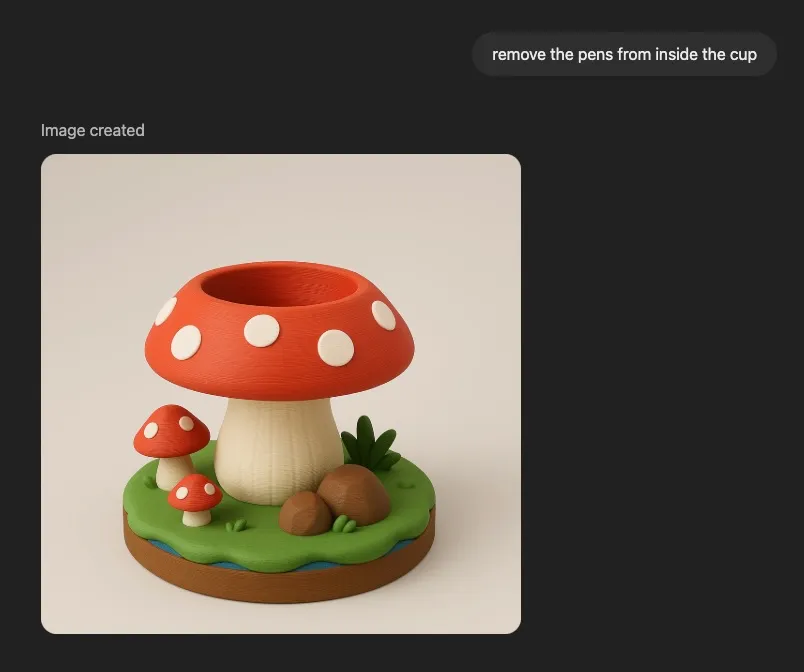
The edit to remove the pens was necessary because anything that appeared in the image would become all one contiguous model, and it’s much easier to ask it to remove the pens now than do it ourselves later.
Image to mesh
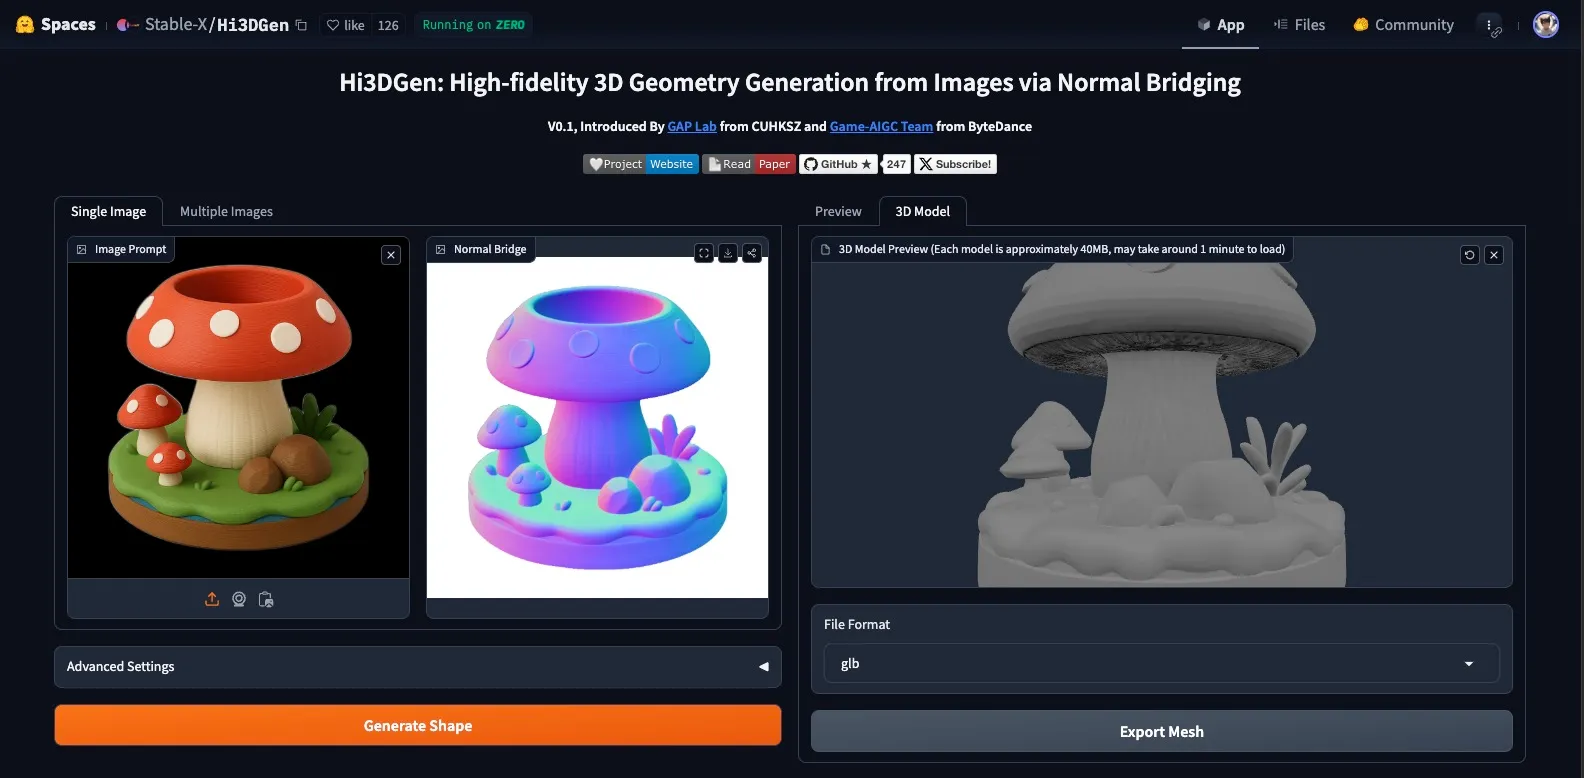
I threw the image at two different image-to-3D tools, Hi3DGen and TripoSG, to see what kind of mesh I’d get. Here is Hi3DGen:
And here’s TripoSG:
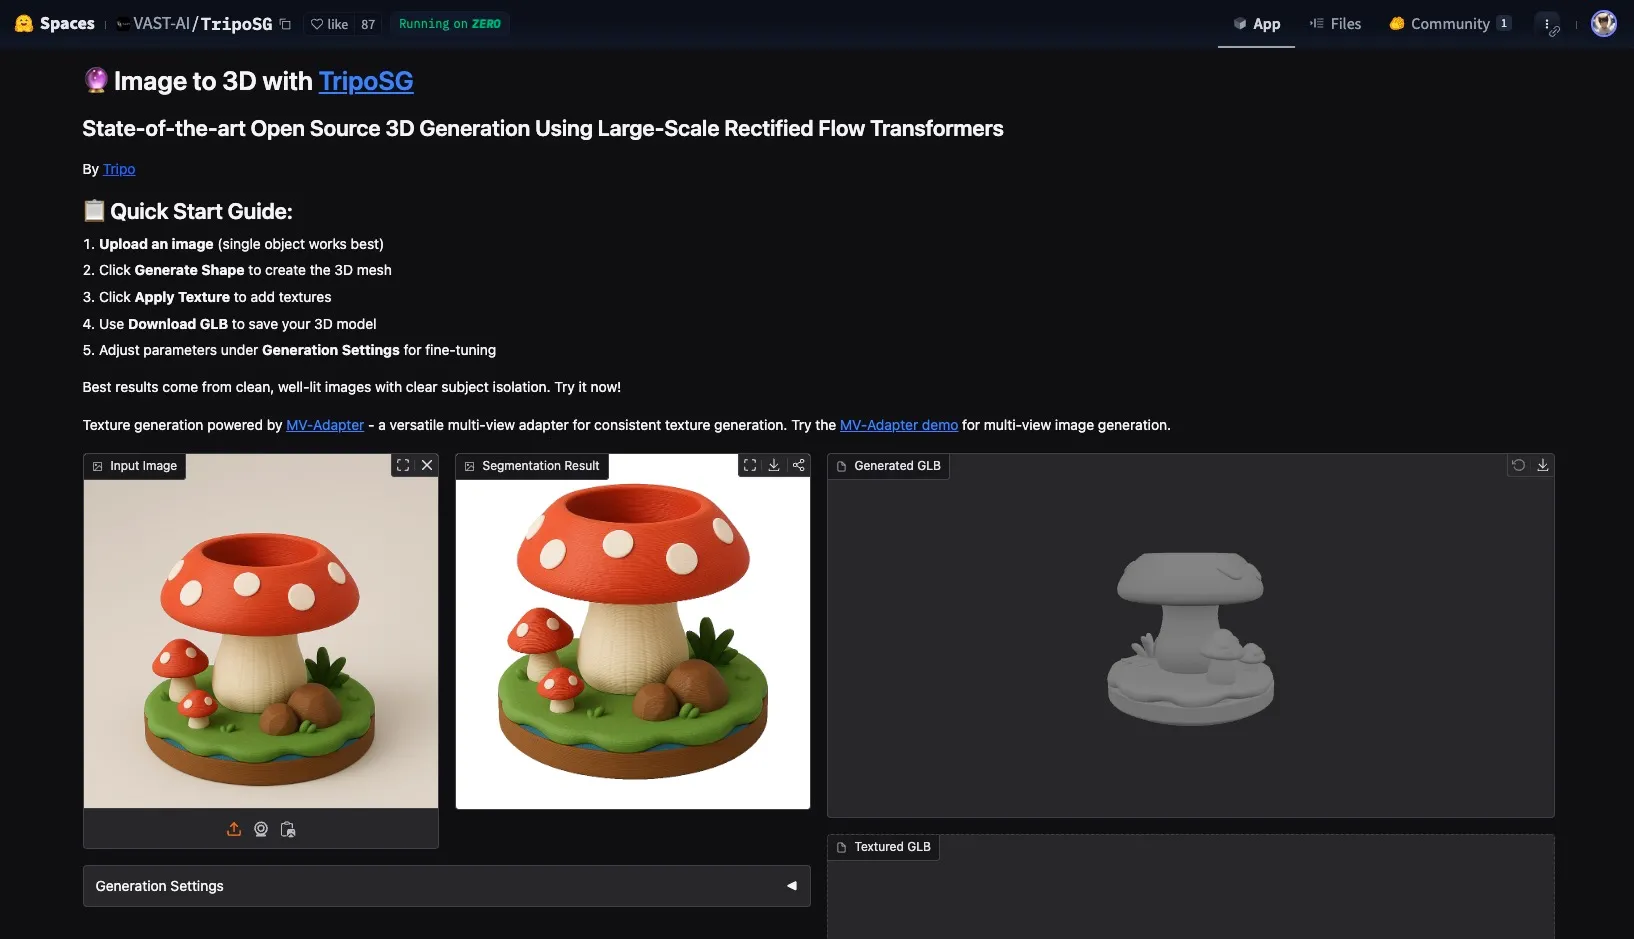
I ended up using the one from Hi3DGen.
Mesh cleanup
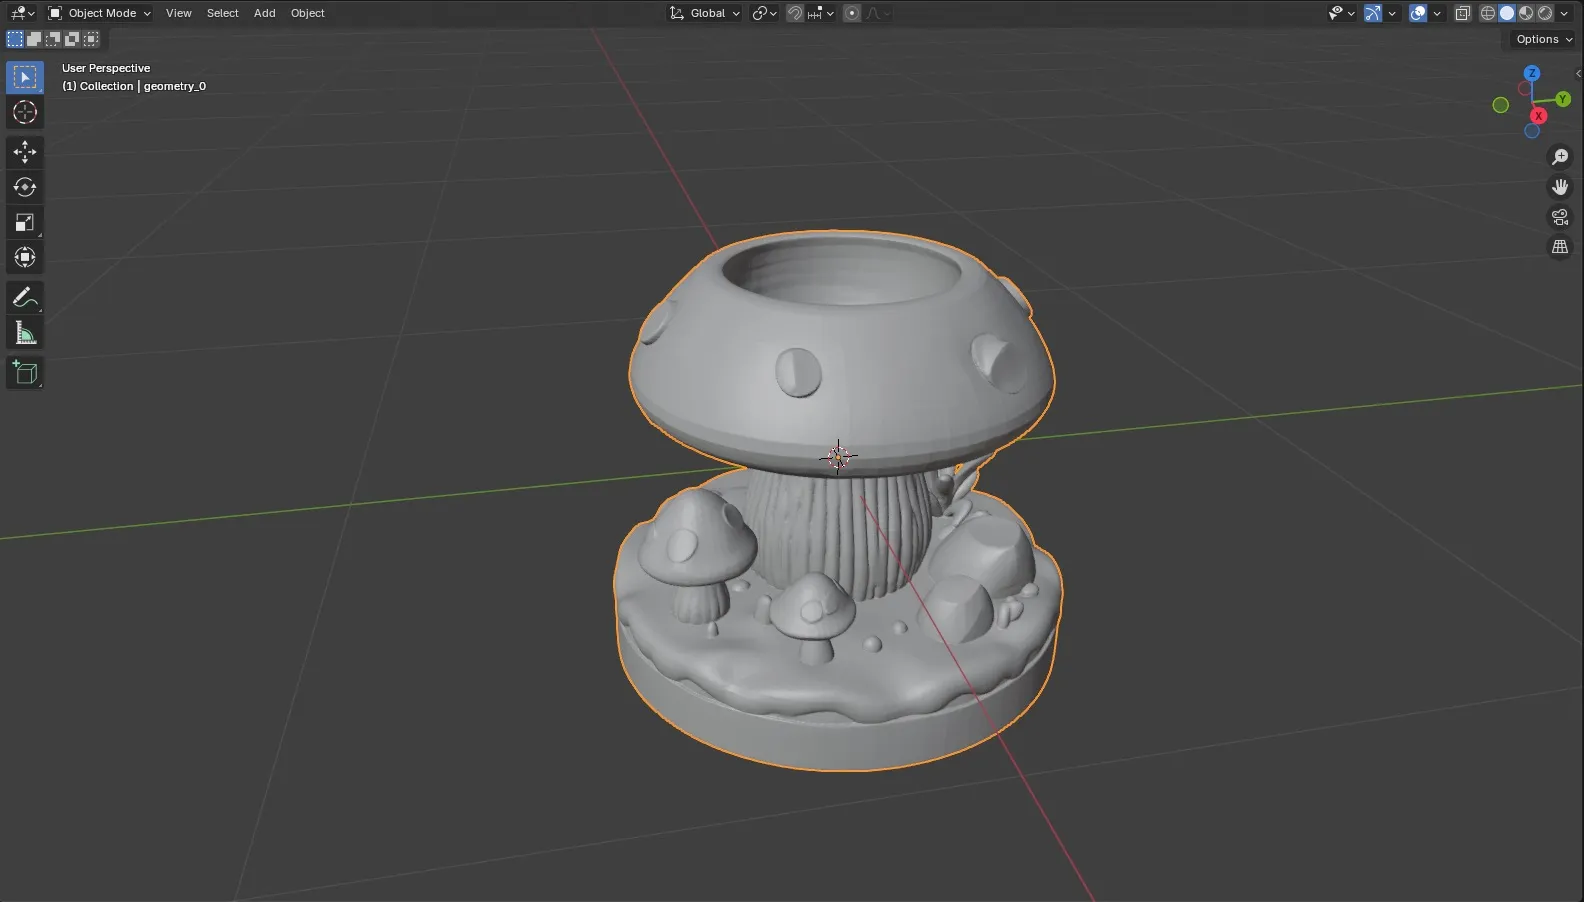
The Hi3DGen model looked pretty decent, but it wasn’t without issues. There were some artifacts around the raised dots on the mushroom, and while the pen cavity seemed fine at first glance, it was completely hollow inside, like a resin print. Not exactly print-ready.
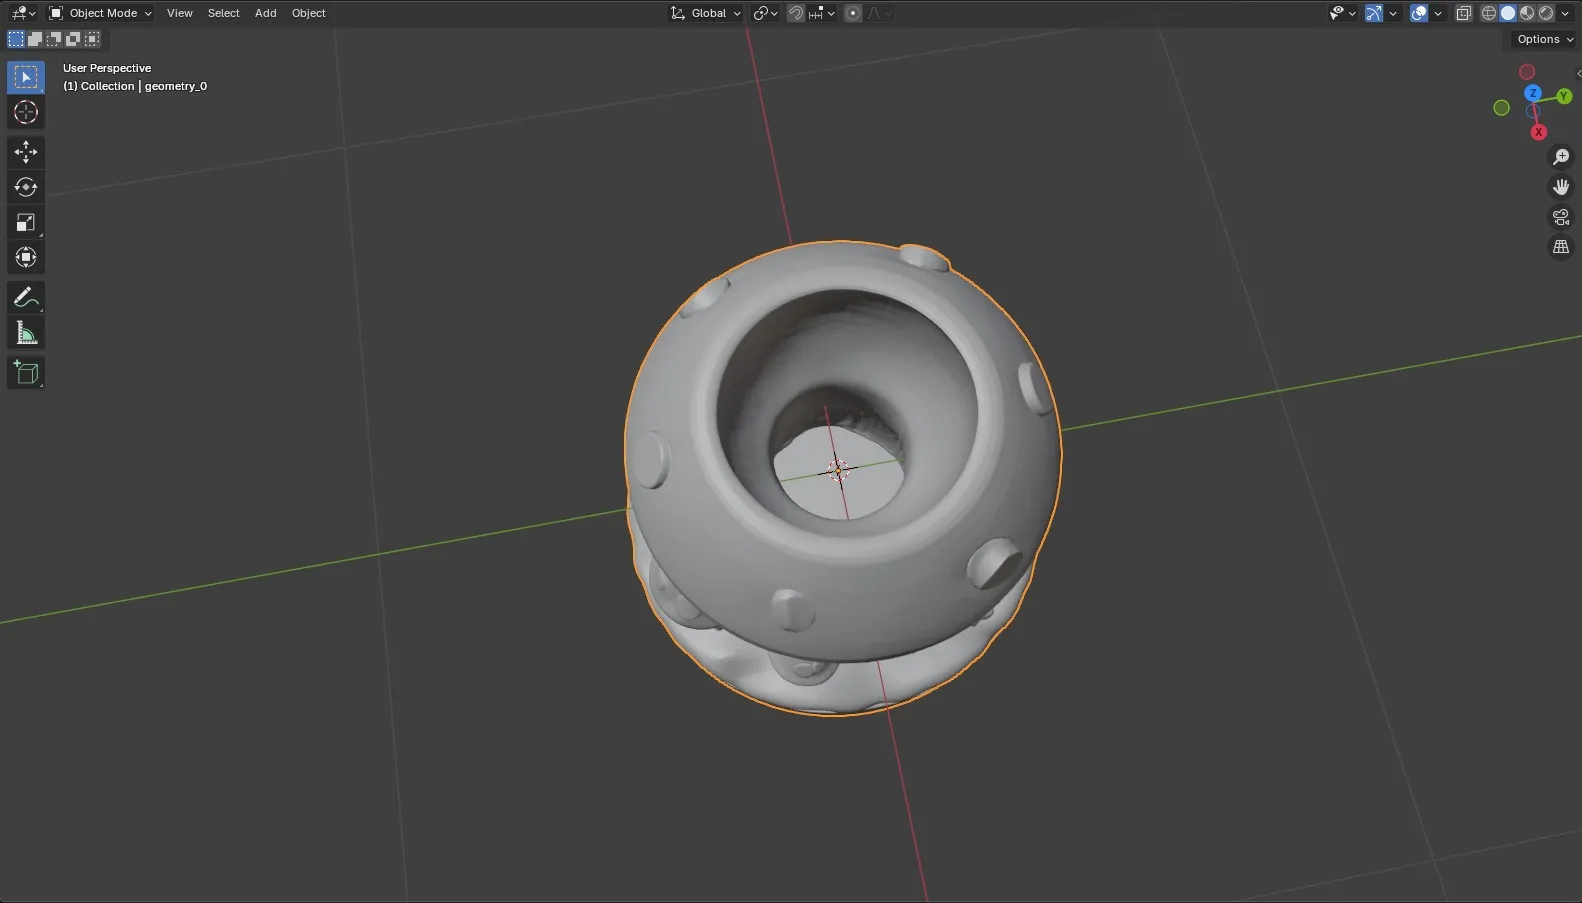
So I cracked open Blender (against my will) and got to work. Selected and removed the drain hole geometry.

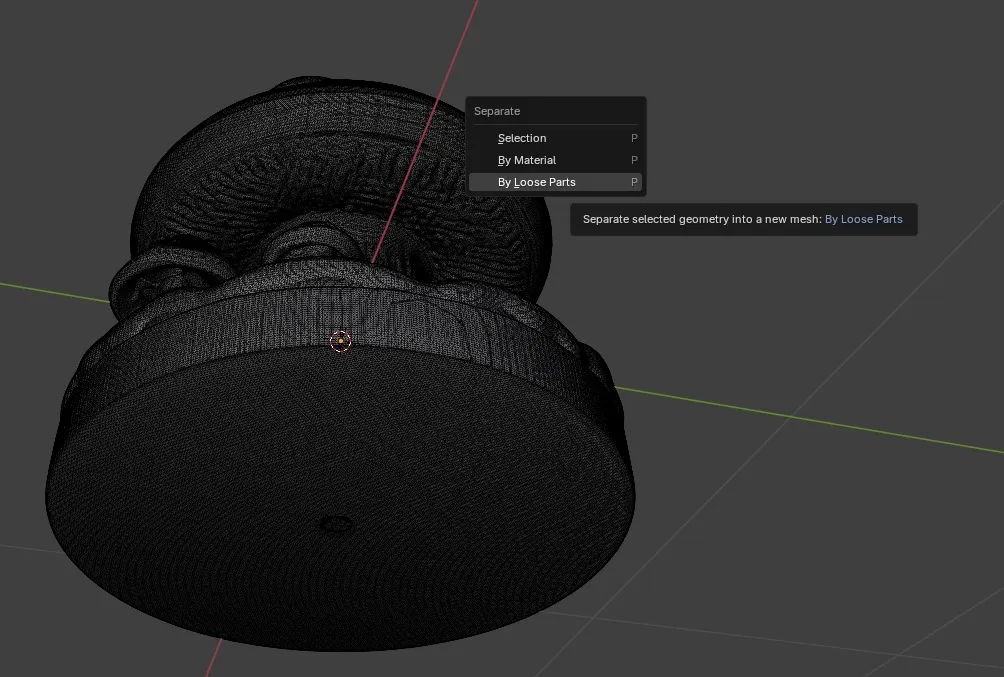
Splitting loose parts in Blender was evidently a critical step and I have literally zero clue why because I don’t use Blender unless I want to cry that day and it was a while ago so I don’t remember. So, do that, I guess. Meshmixer did not like the mesh without this step.
The poly count situation
At first glance it looks kinda low-poly, right?

It’s not. Look at the wireframe to see the actual topology:
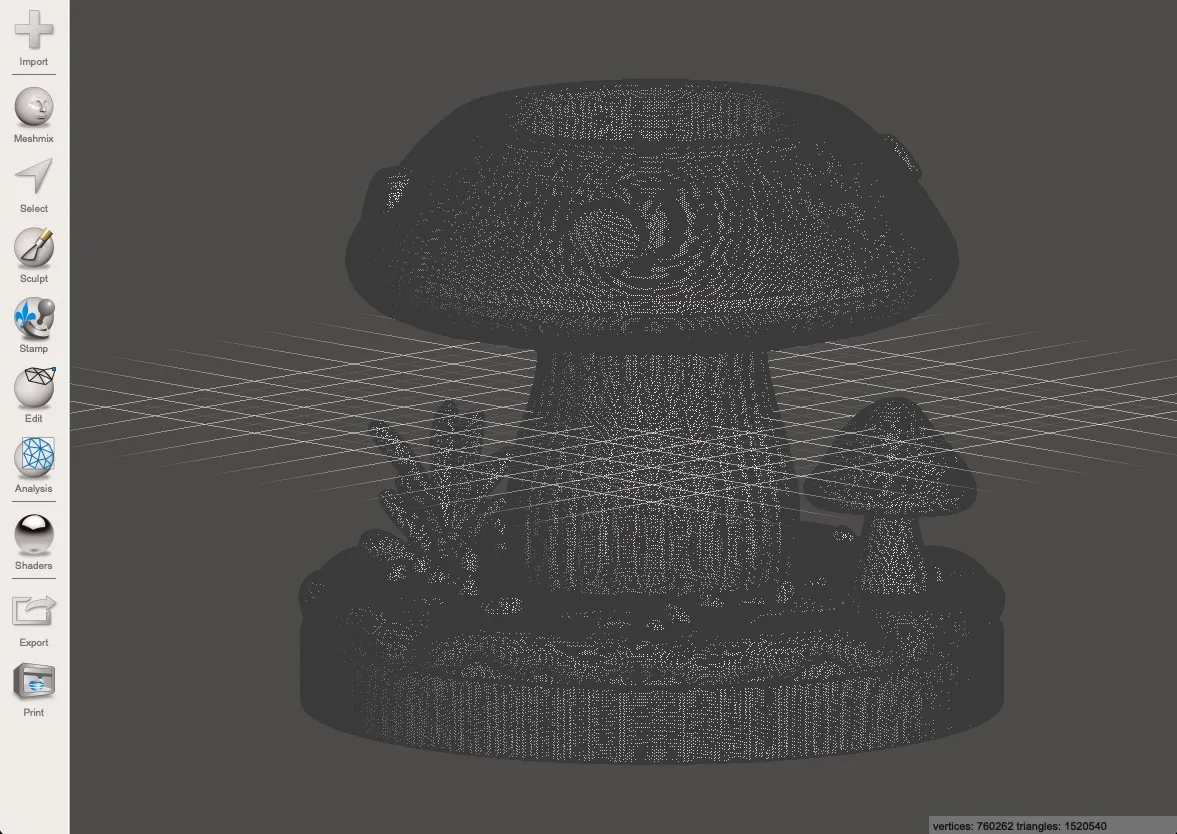
It is very much not. Dear God. That shit’s so dense I could drop it on tungsten and leave a dent.
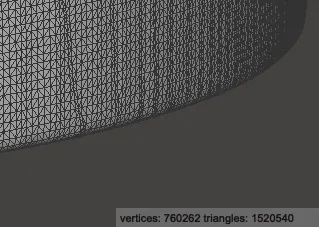
Clearly Hi3DGen had learned the aesthetic of low-poly from a bunch of re-meshed low-poly models that were probably obliterated in TinkerCAD at some point and then subdivided to oblivion, you know, for “quality.” Trained on stolen art, just how I like it. jk please hire artists and pay them.
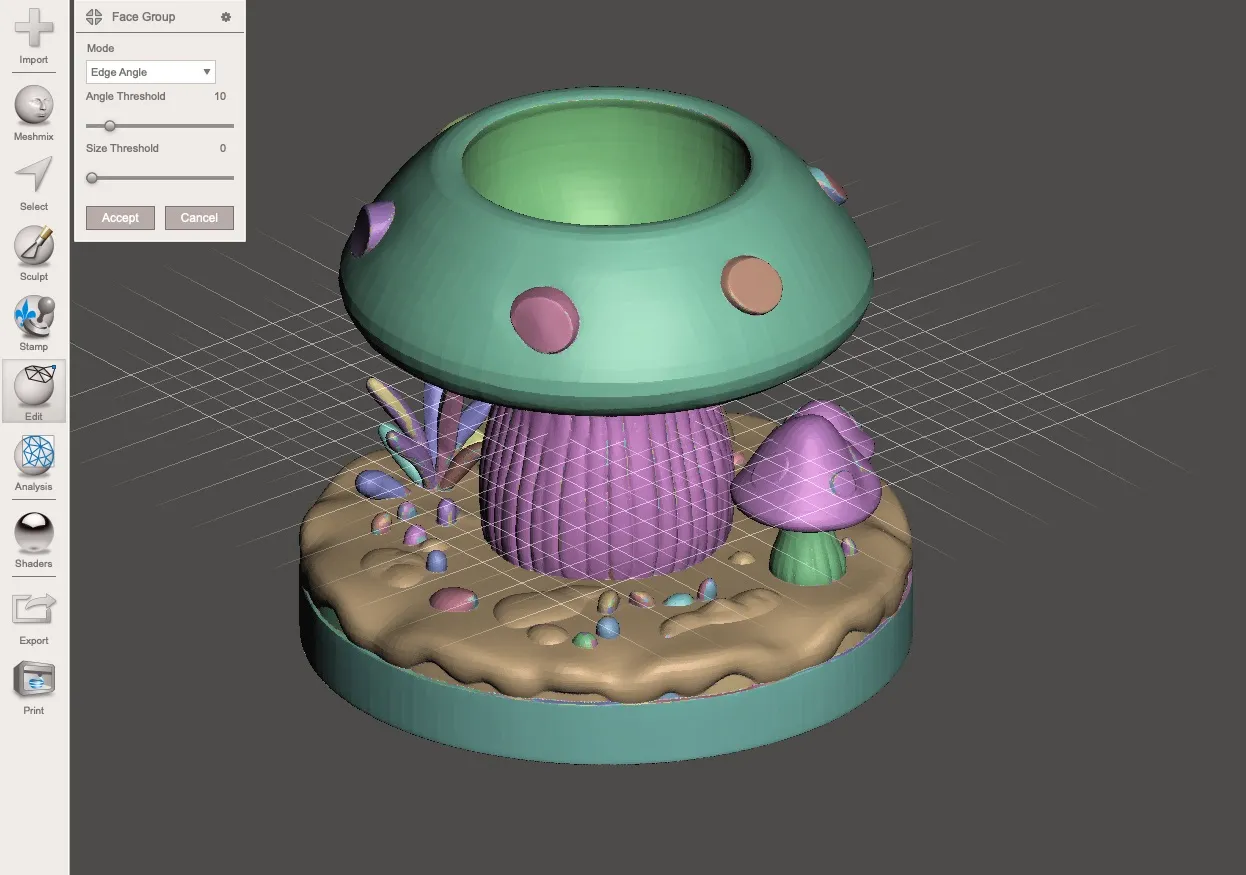
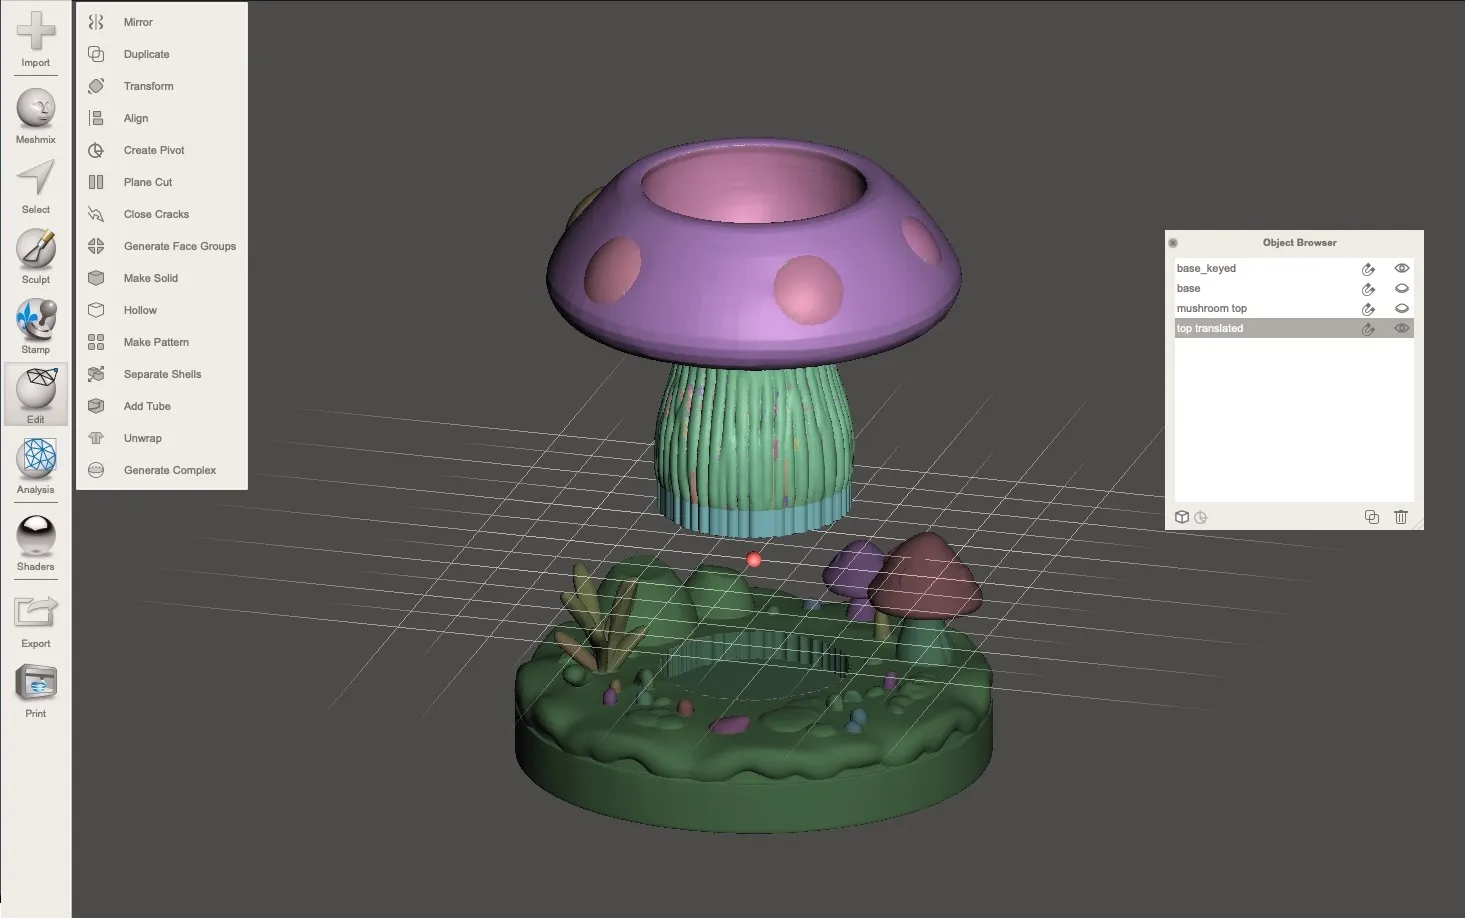
With that, I brought it into my favorite piece of deprecated software, Meshmixer, to generate face groups and split the model into separately printable parts. This is my favorite part, compulsive optimization. Splitting it up means I can print each piece in the best orientation and minimize supports. I also had to key the parts with holes and extra material for them to attach to each other and add clearances.
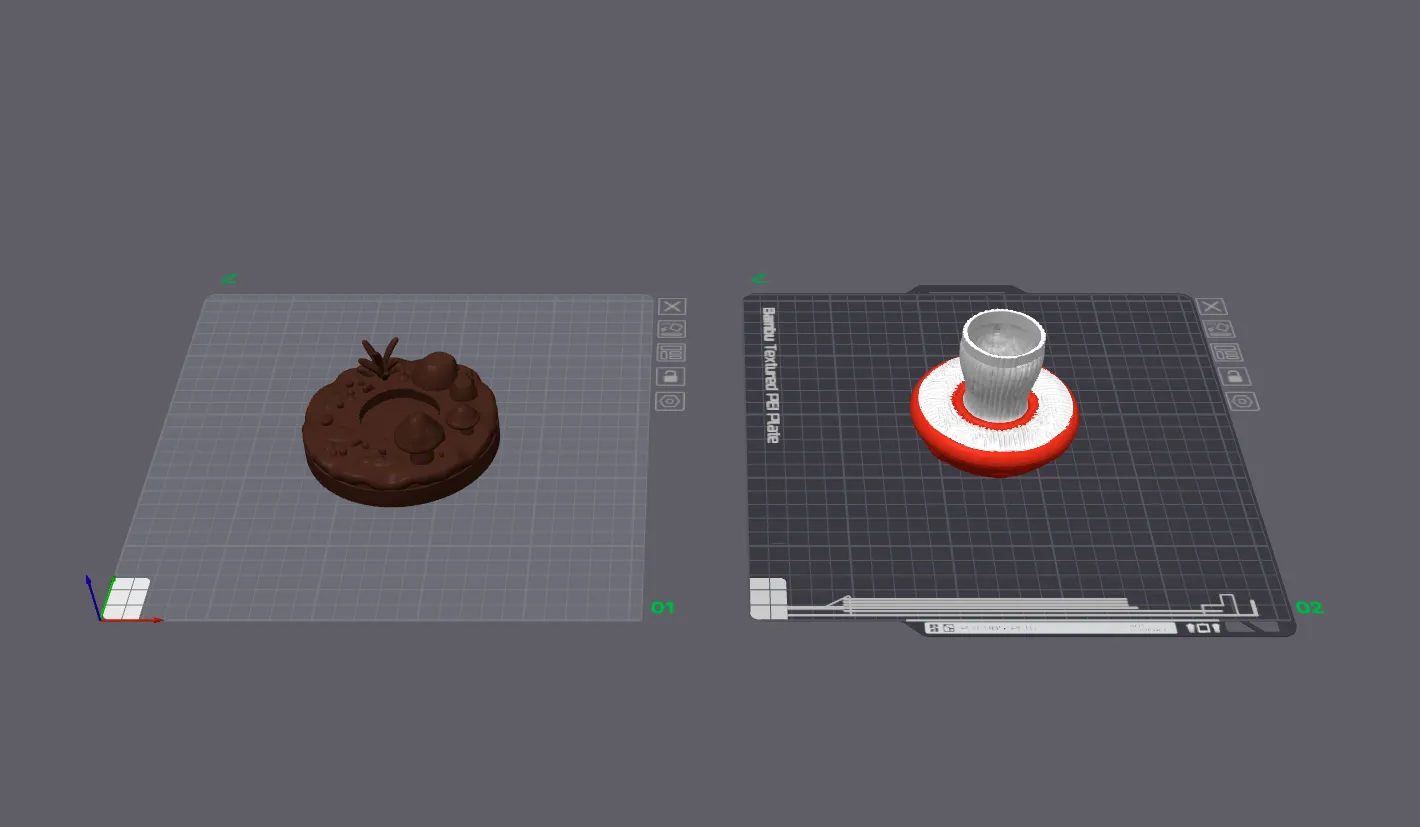
Slicing and printing
With the parts split, I arranged everything in Bambu Studio. For reference, the single-part multicolor estimate was absurdly long. Splitting was definitely the right call, and I can tell because I noticed I could do some bumblefuckery to still get a quick multi-color print. More on that later.
Here’s what it would have looked like if I had just painted it in the slicer and printed it in one piece. Eight hours of mostly waste:
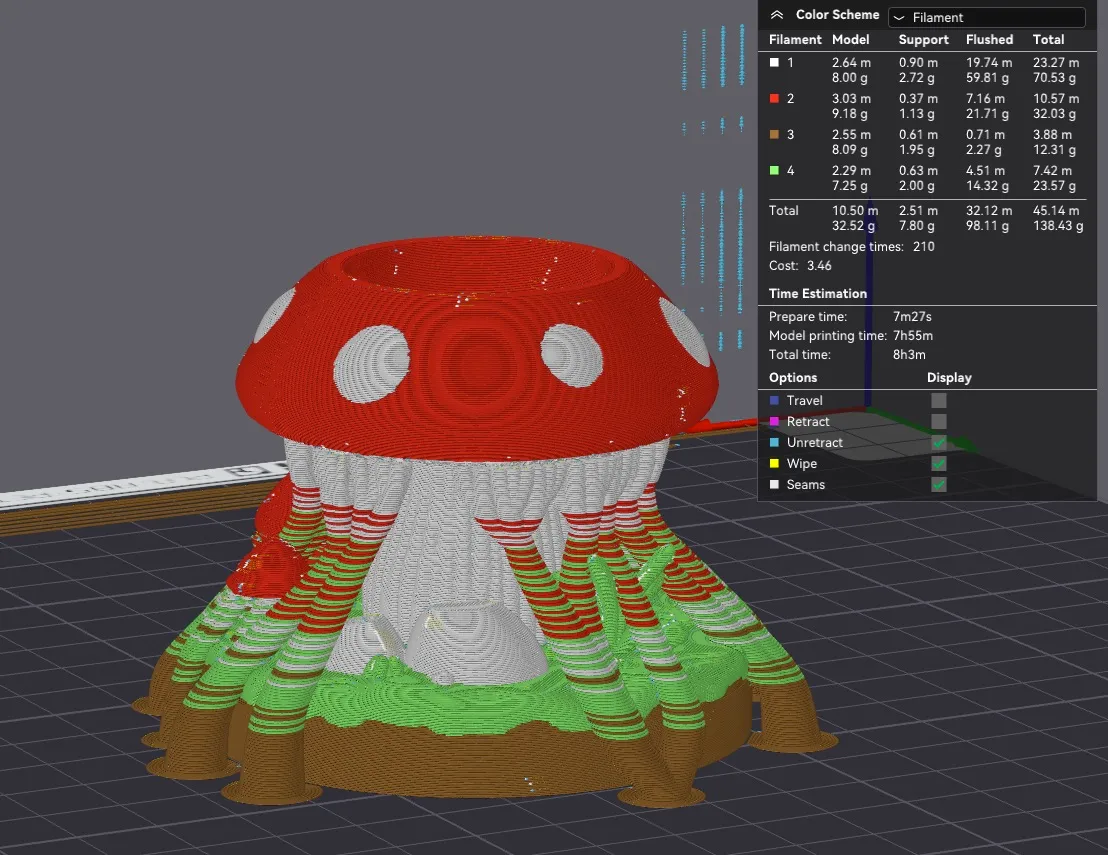
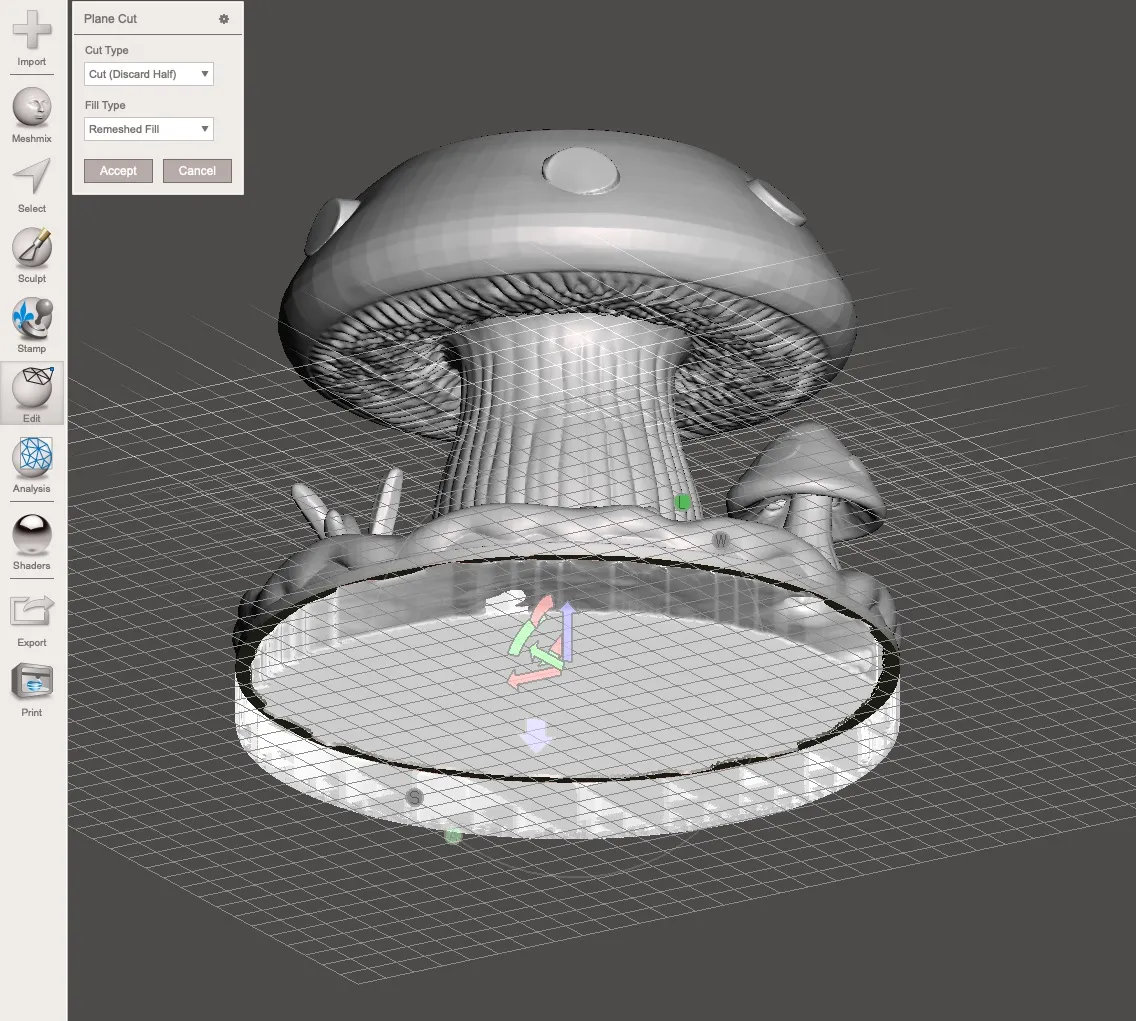
The base printed in brown, and the mushroom cap printed upside down. Why? It was just easier that way. By pure chance, a plane cut under the mushroom top, above the lamellae (gill looking things), would approximately split the differently colored regions appropriately. This means that with only one filament swap during the print, I can still have multicolor regions: the red cap, white stem, and white lamellae; without producing the amount of waste that painting and supporting the single-piece version would have. This is only absurd because the shape was a mistake of pure chance by the AI model; if I had designed this model instead of letting a robot do it, the lamellae would have been more concave than convex, meaning this little trick wouldn’t have been so effective. But I’ll take the win.
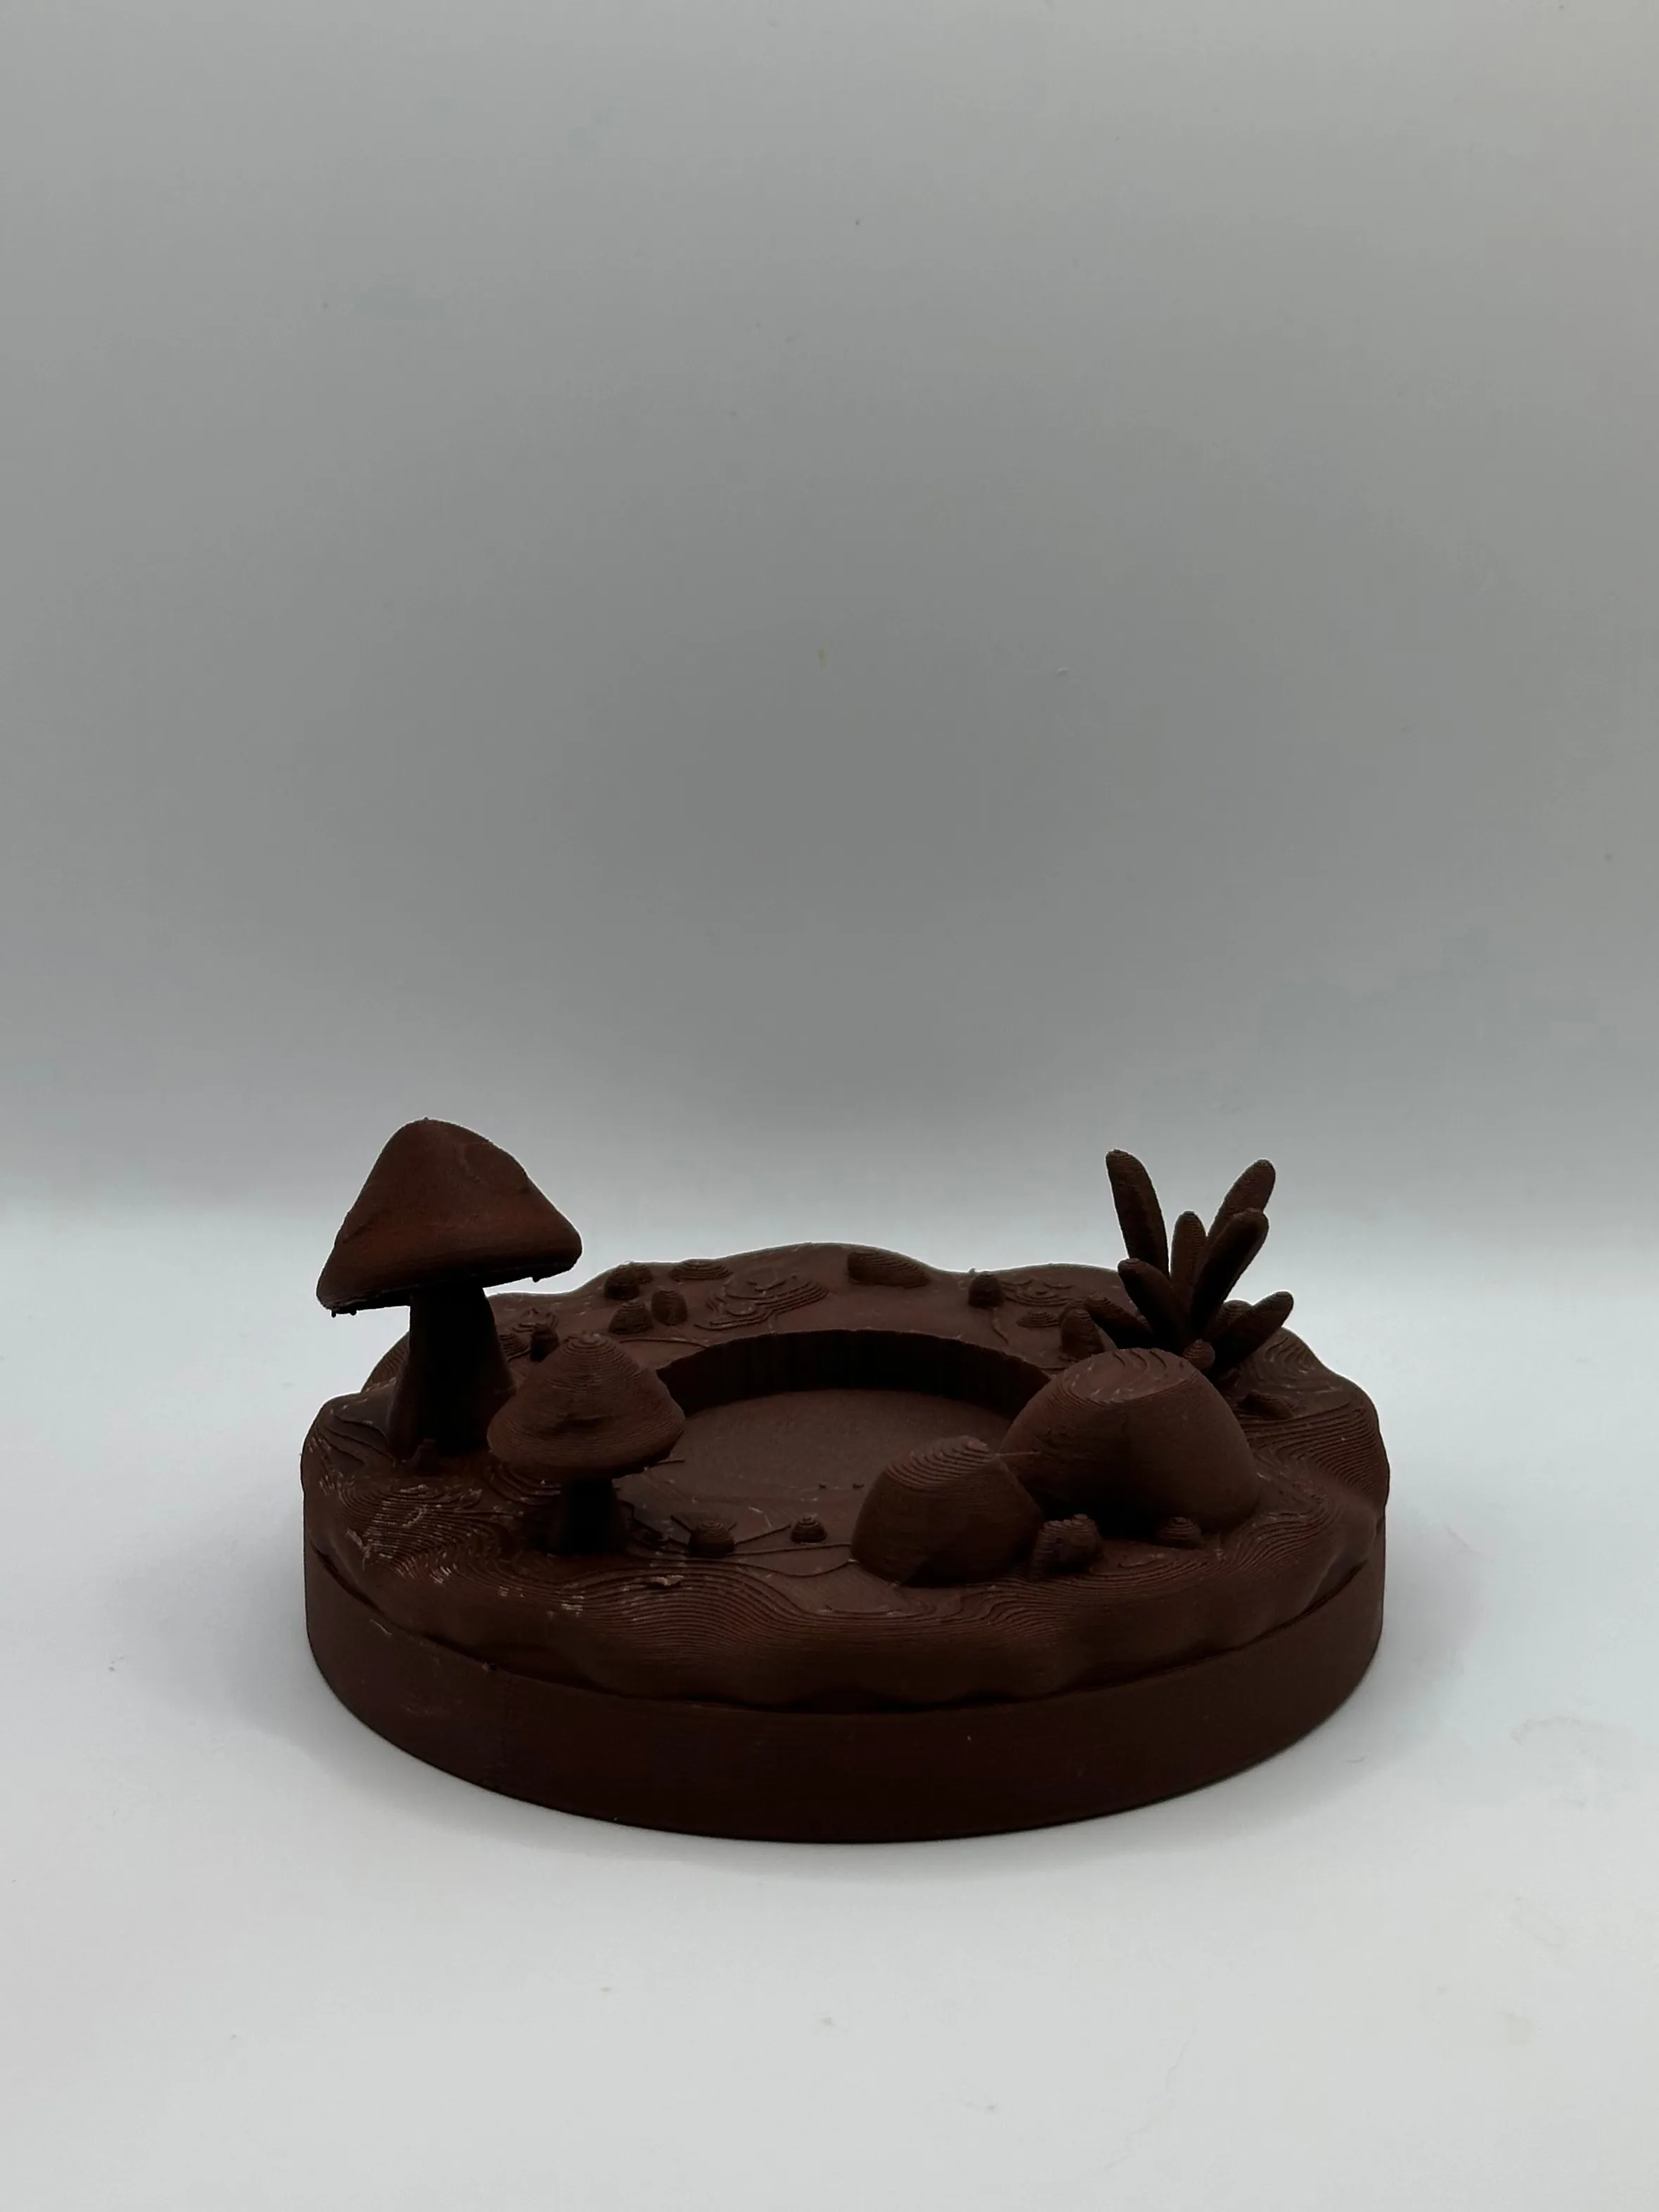
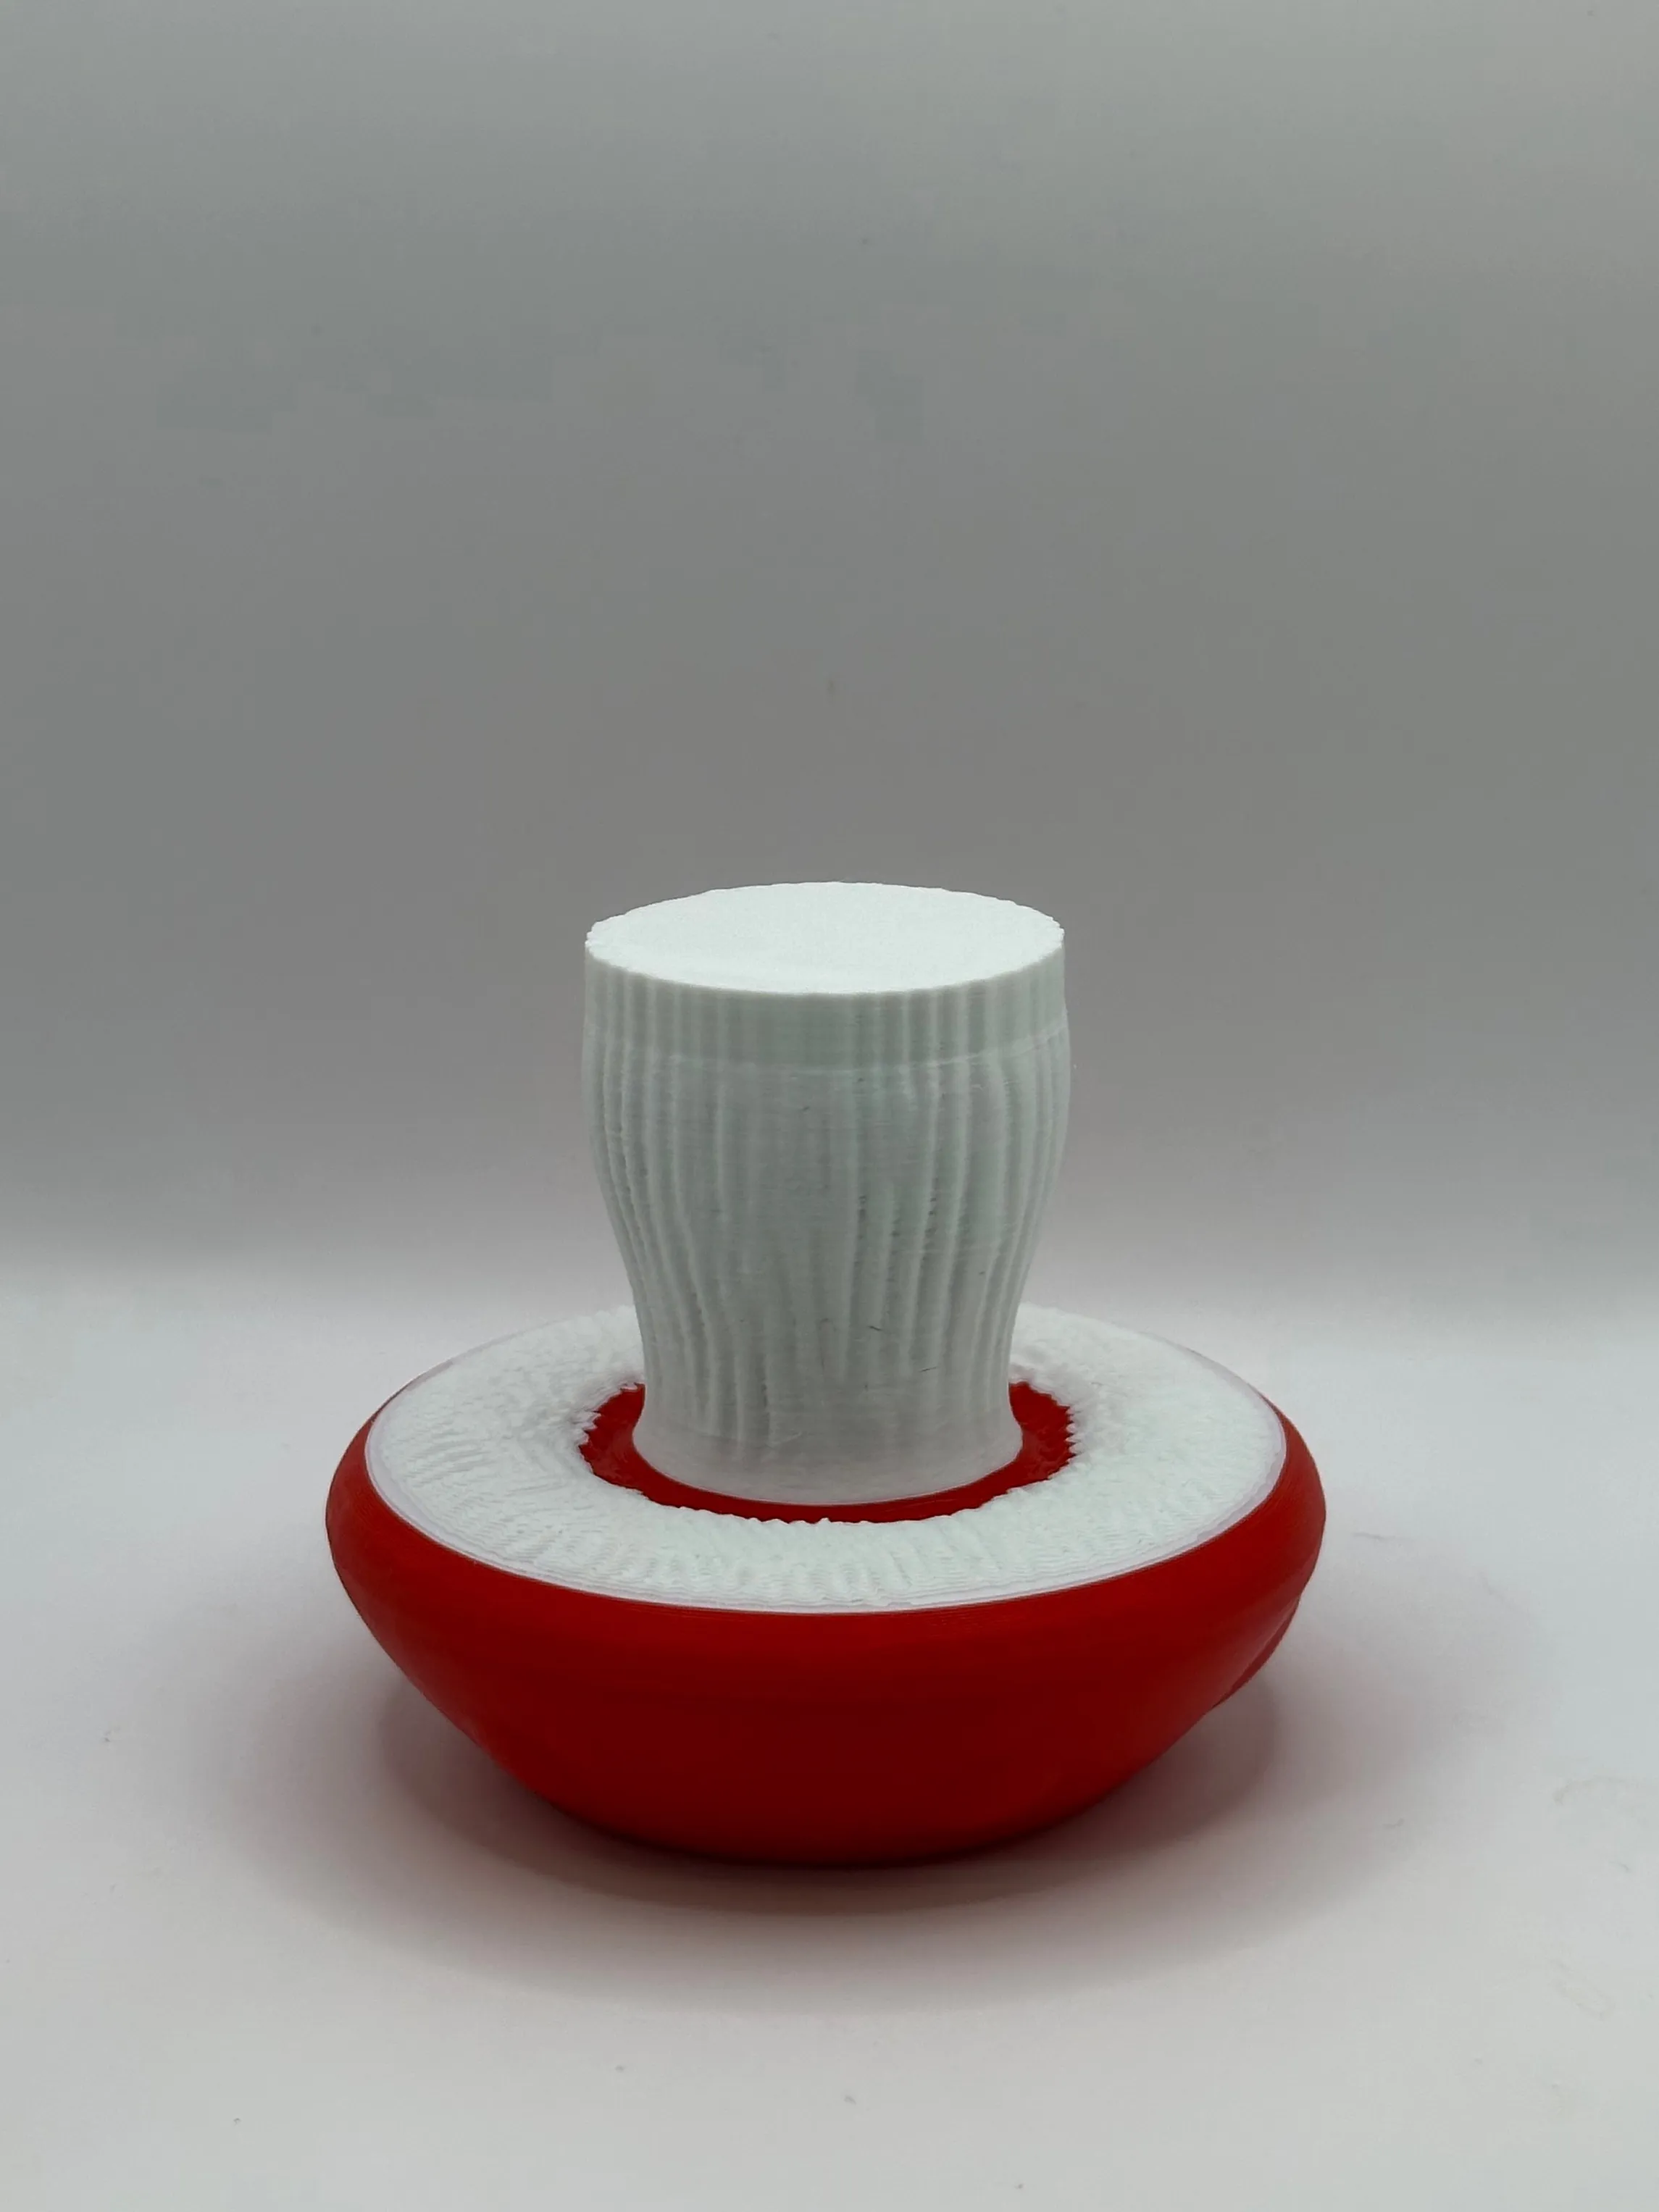
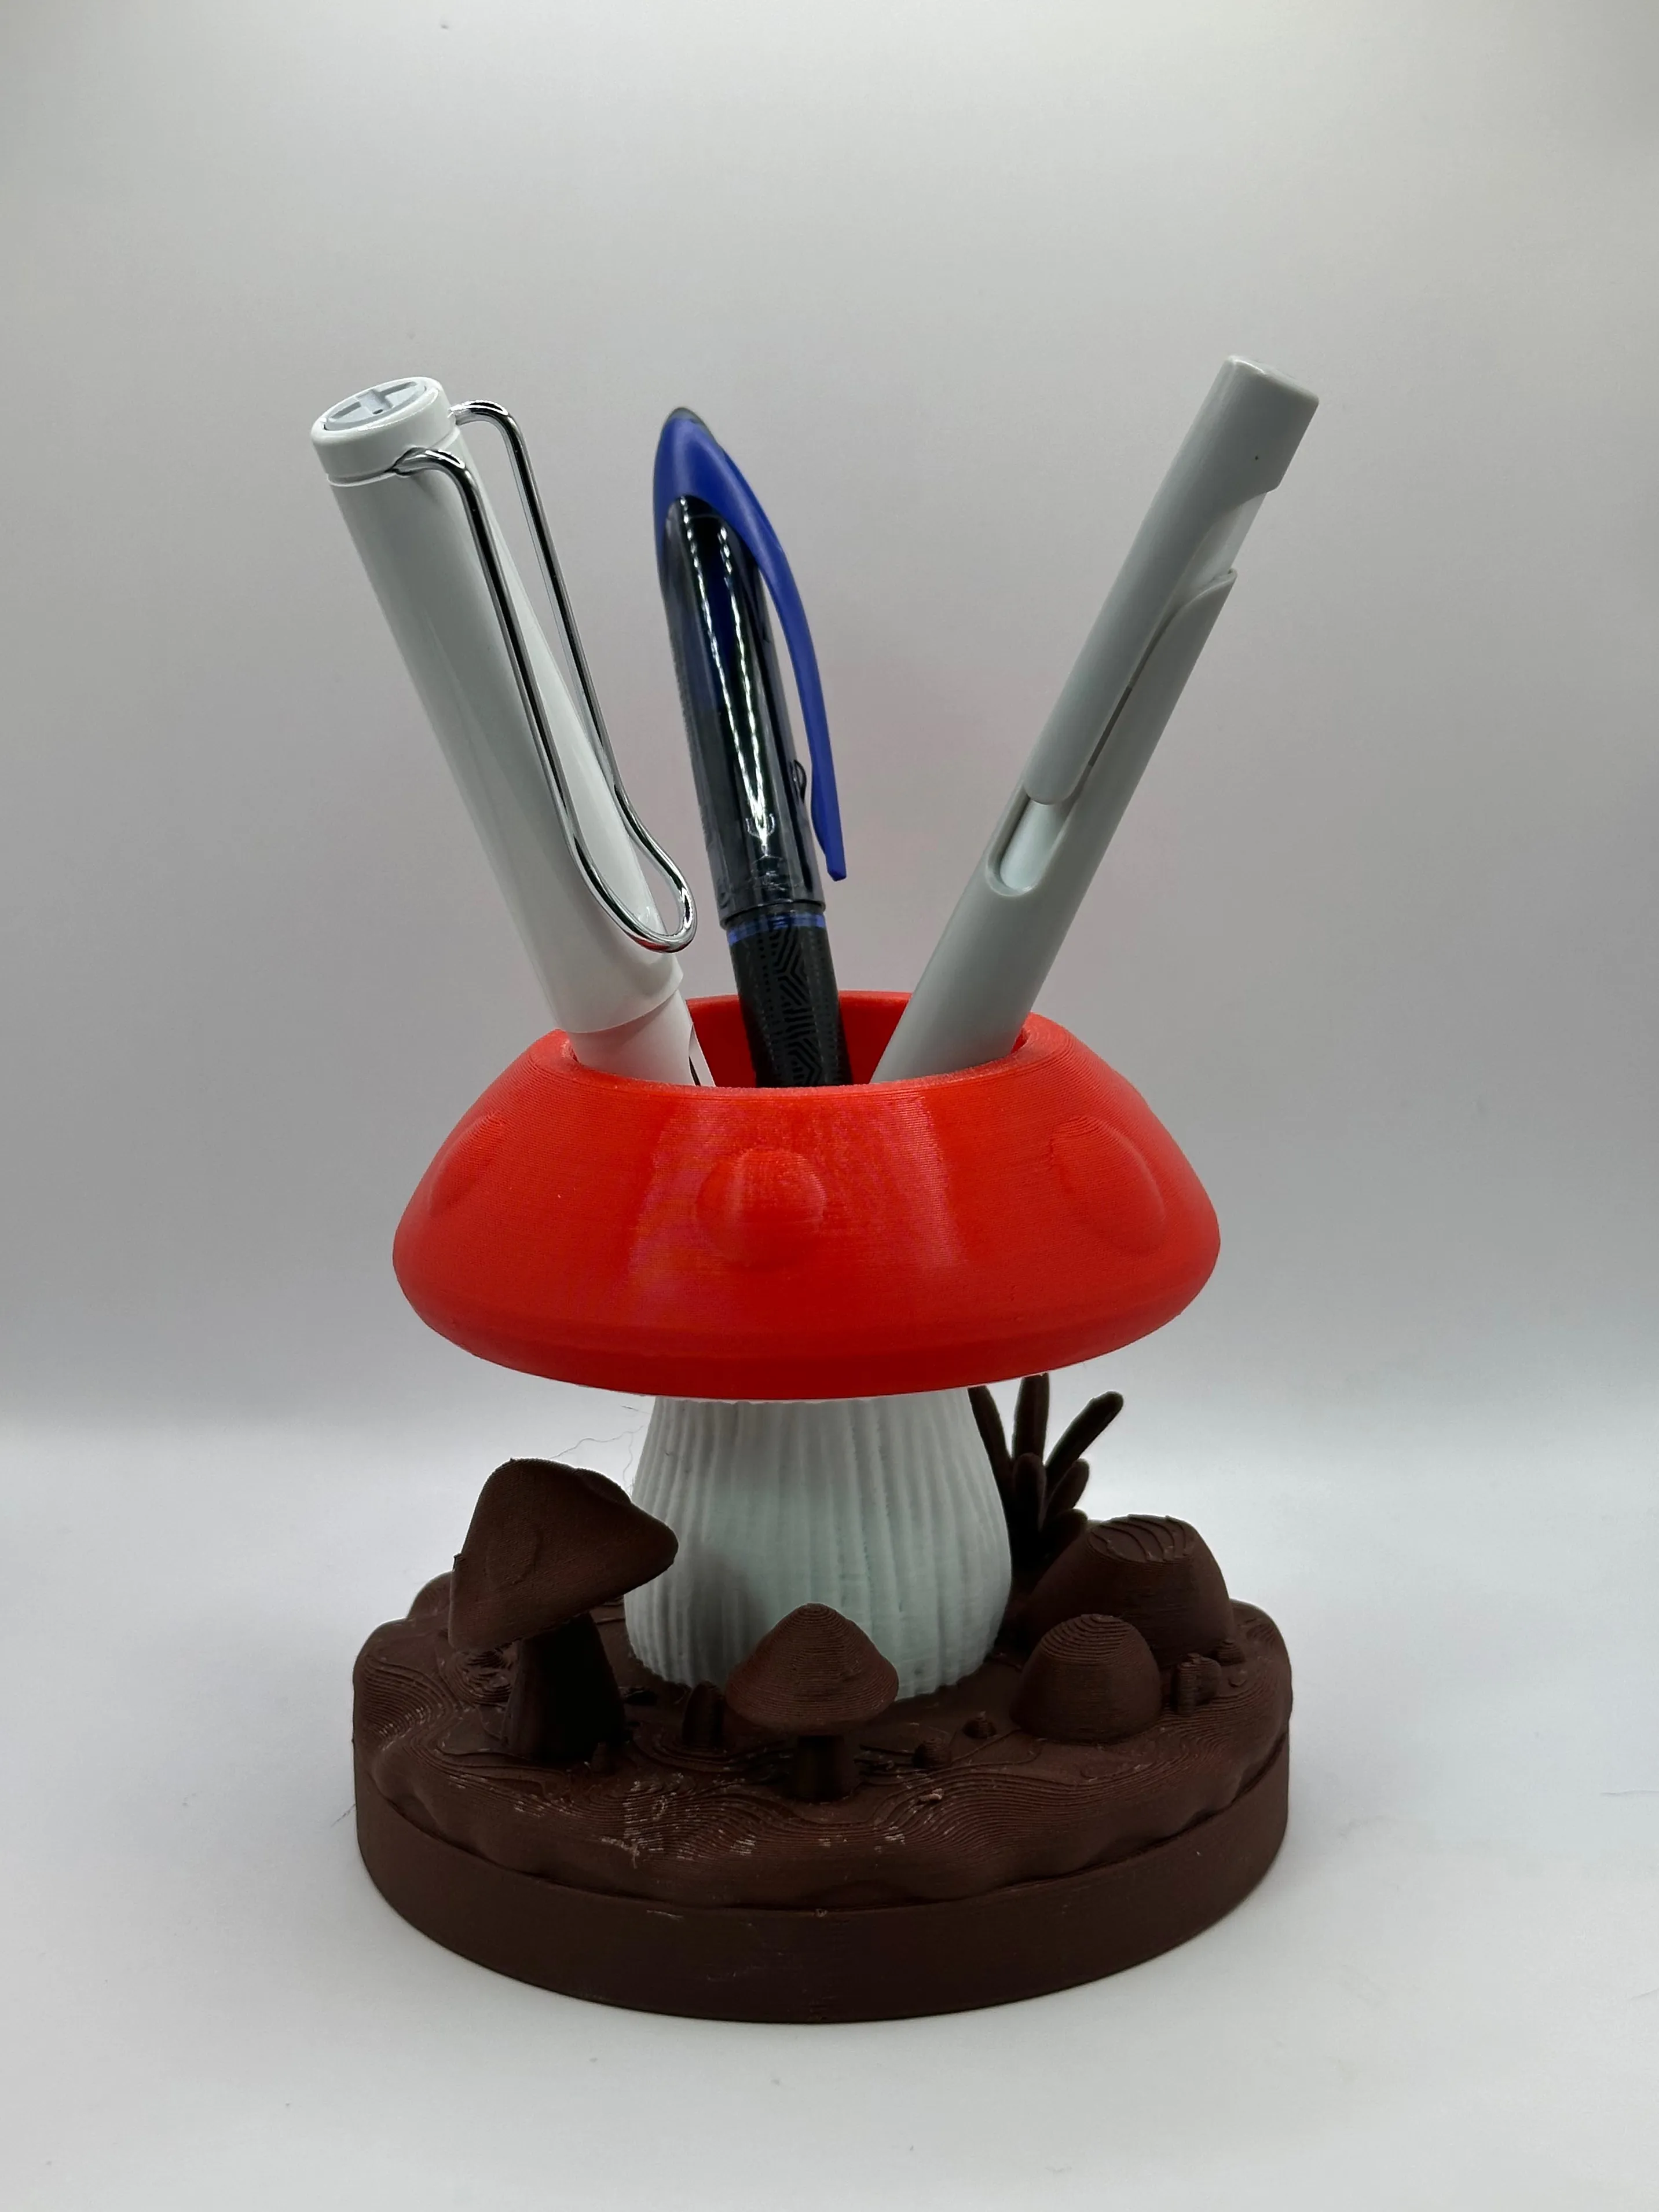
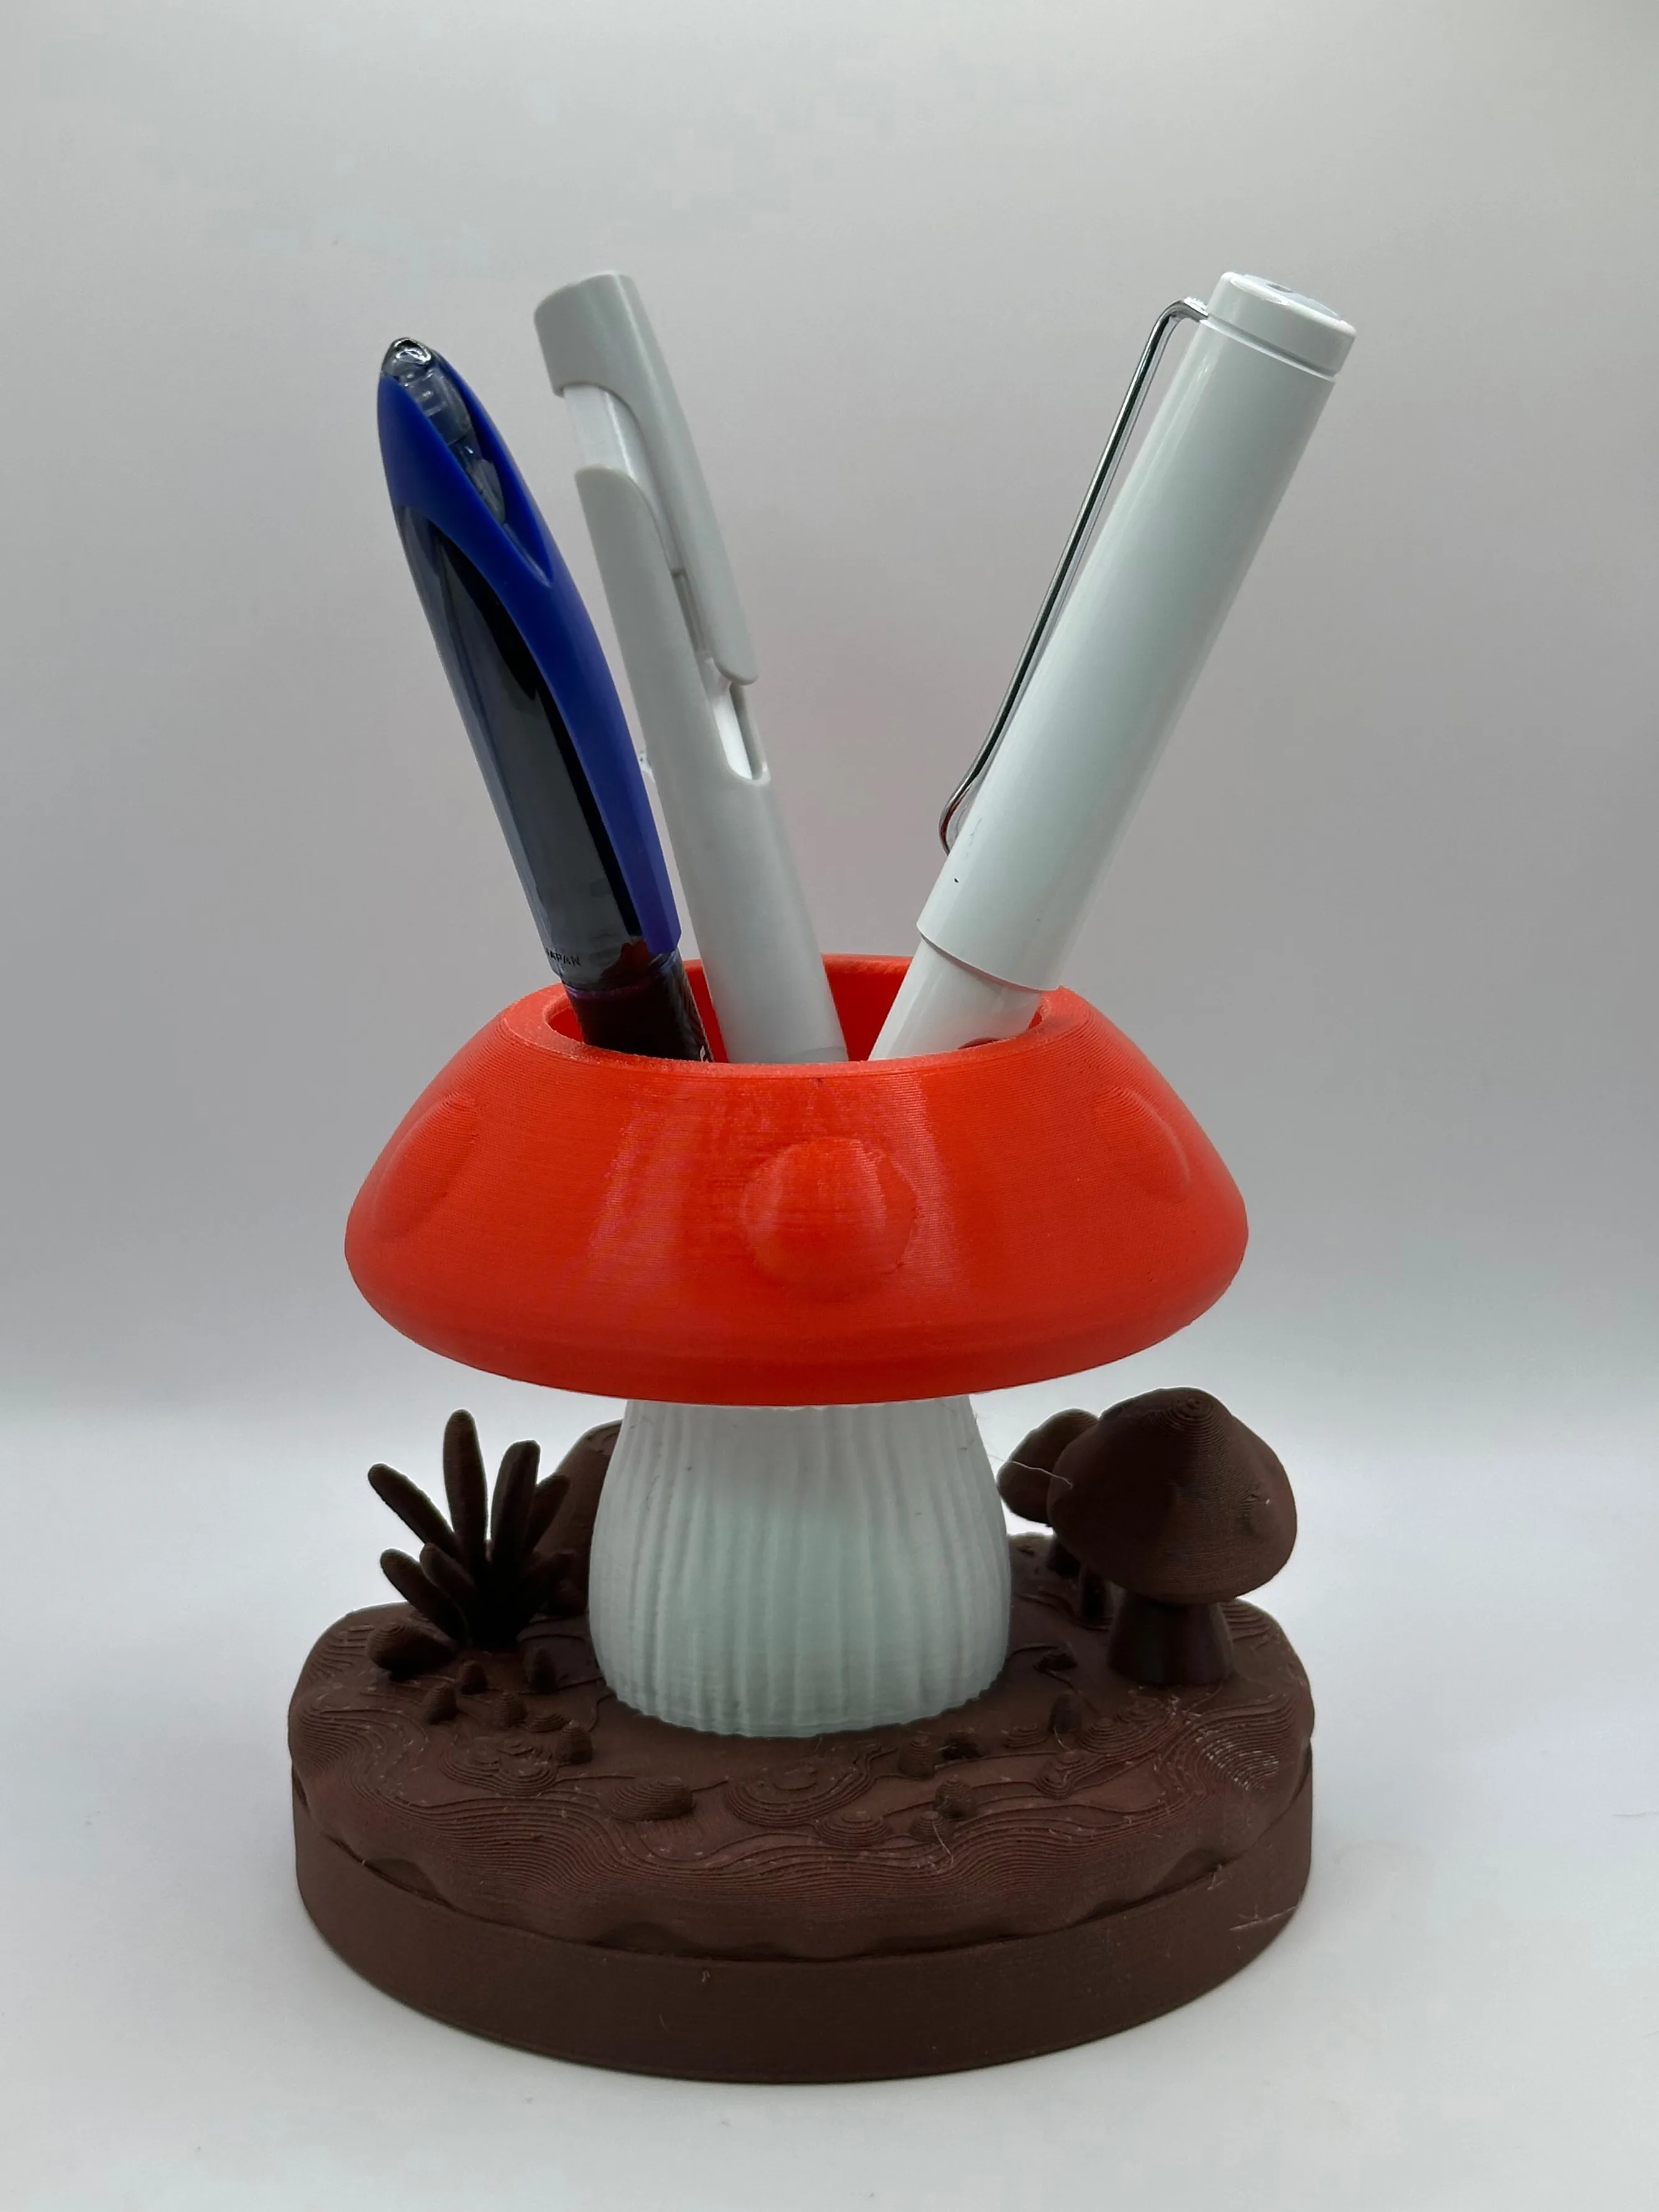
The final trinket
And here it is. A mushroom pen holder, conjured from a ChatGPT image, run through an AI mesh generator, cleaned up by hand, and optimized for FDM. Honestly one of the more charming things to come off the printer.
Download my machine slop on MakerWorld if you wish.
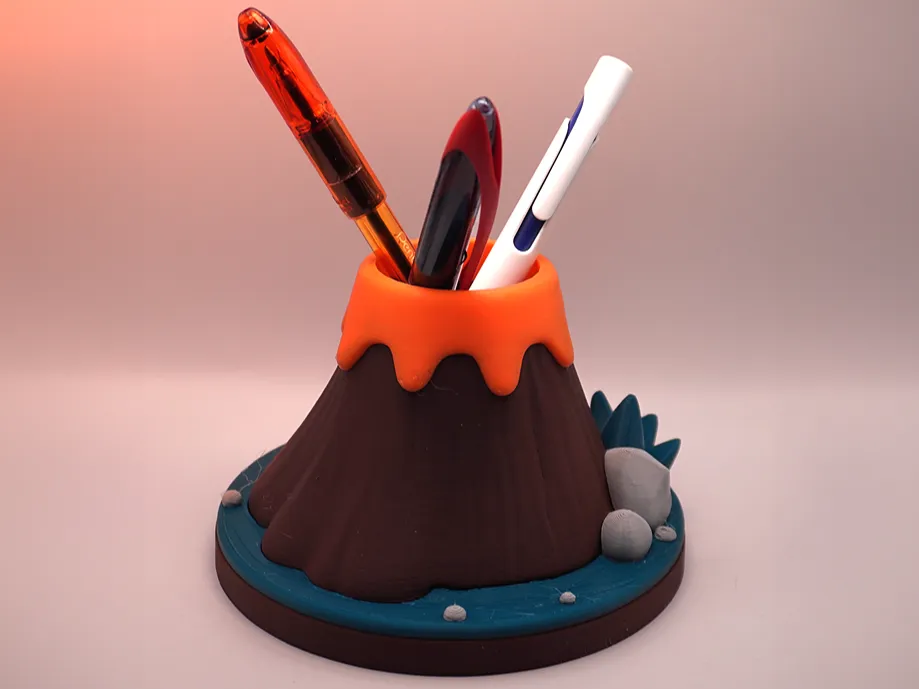
I also made another pen island with the same technique but less waste reduction. Find it also on MakerWorld, the safe-haven for AI slop in the third dimension. That place is just crawling with it.
k love u bye